Manufacturer installation file converted to web guide

Capsule Bed Installation Guide

Complete visual assembly instructions for capsule beds and sleeping pods, including frame setup, bottom and top capsule panels, door fitting, ladder, accessories, air fan, electrical reference, side panel and back panel.

Capsule bed installation overview

38 visual references

All images from the manufacturer DOCX are included in order.

Safety-first flow

Frame, panels, door and electrical areas are separated clearly.

Installer friendly

Designed for mobile site visits and desktop review before dispatch.

Installation phase

Before starting

2 steps
01. Review capsule description and parts layout
01

Review capsule description and parts layout

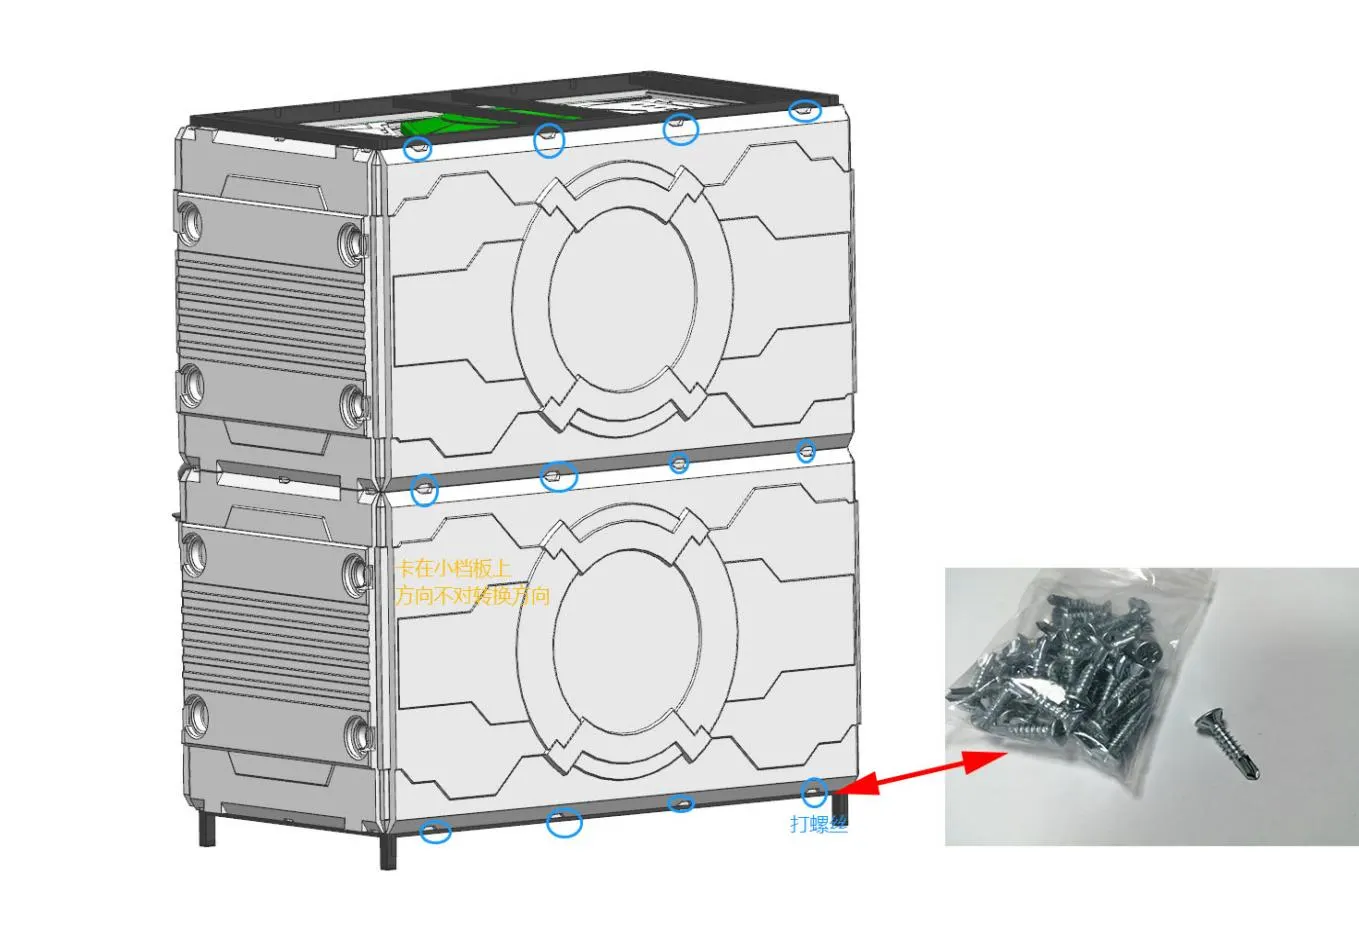
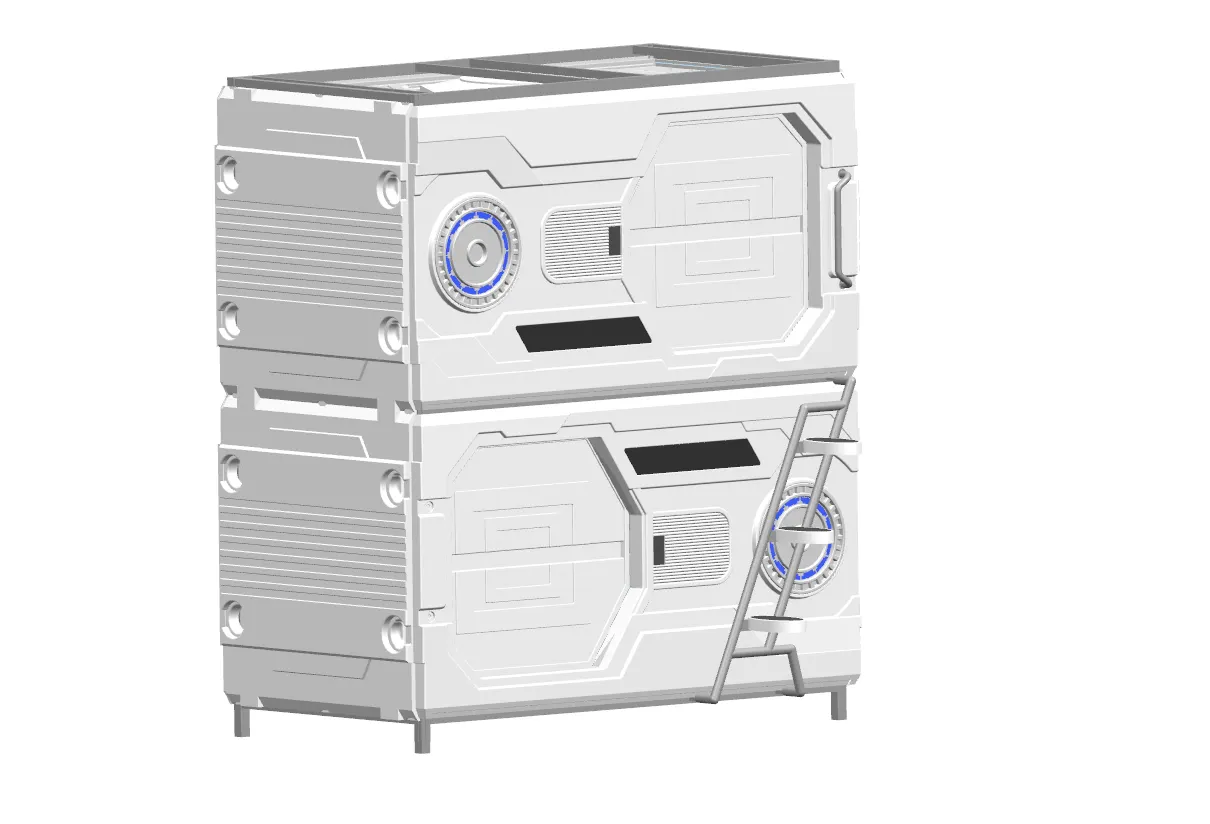
Use the manufacturer overview image to identify the main frame, panels, door, ladder, air fan and accessory positions before assembly.
02. Read the installation tips
02

Read the installation tips

Confirm orientation marks, keep fasteners grouped, and verify the top and bottom capsule parts before lifting or fixing panels.

Installation phase
Bottom capsule

10 steps
03. Assemble frame protector
03

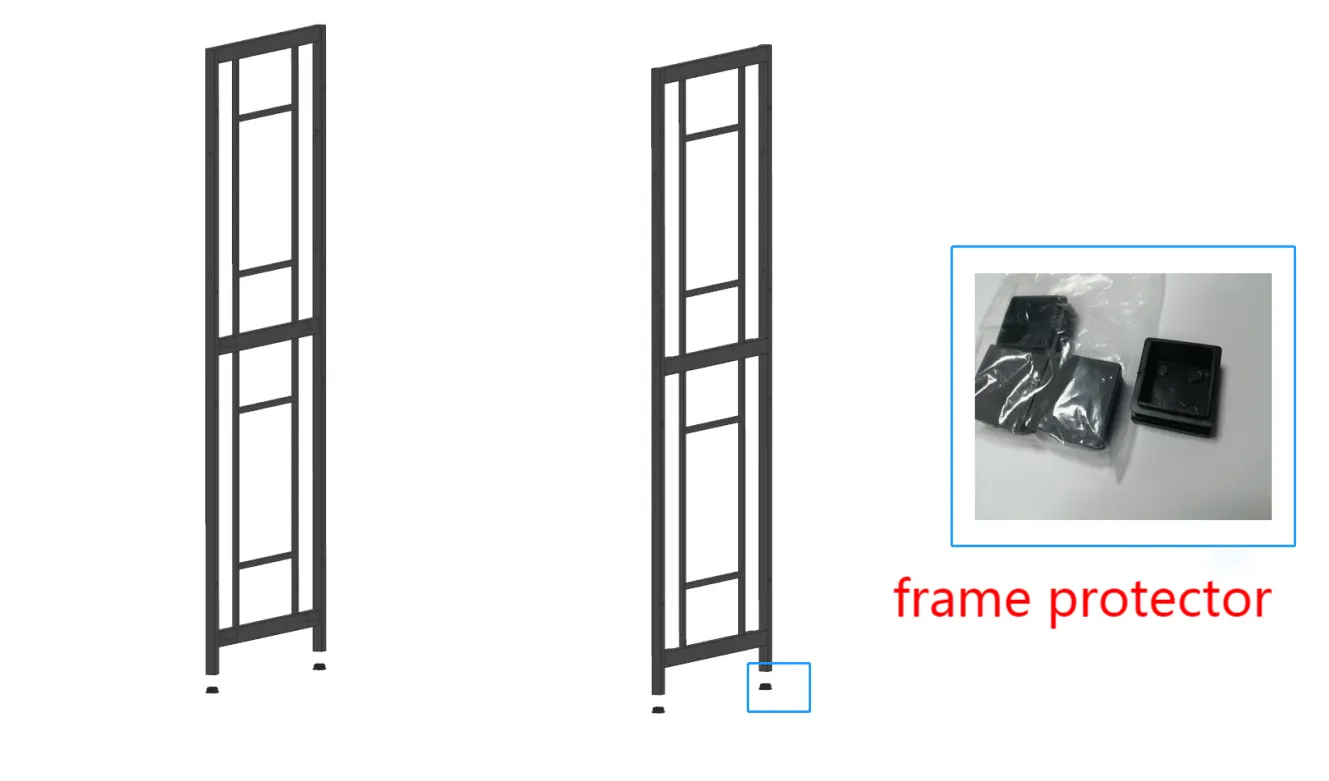
Assemble frame protector

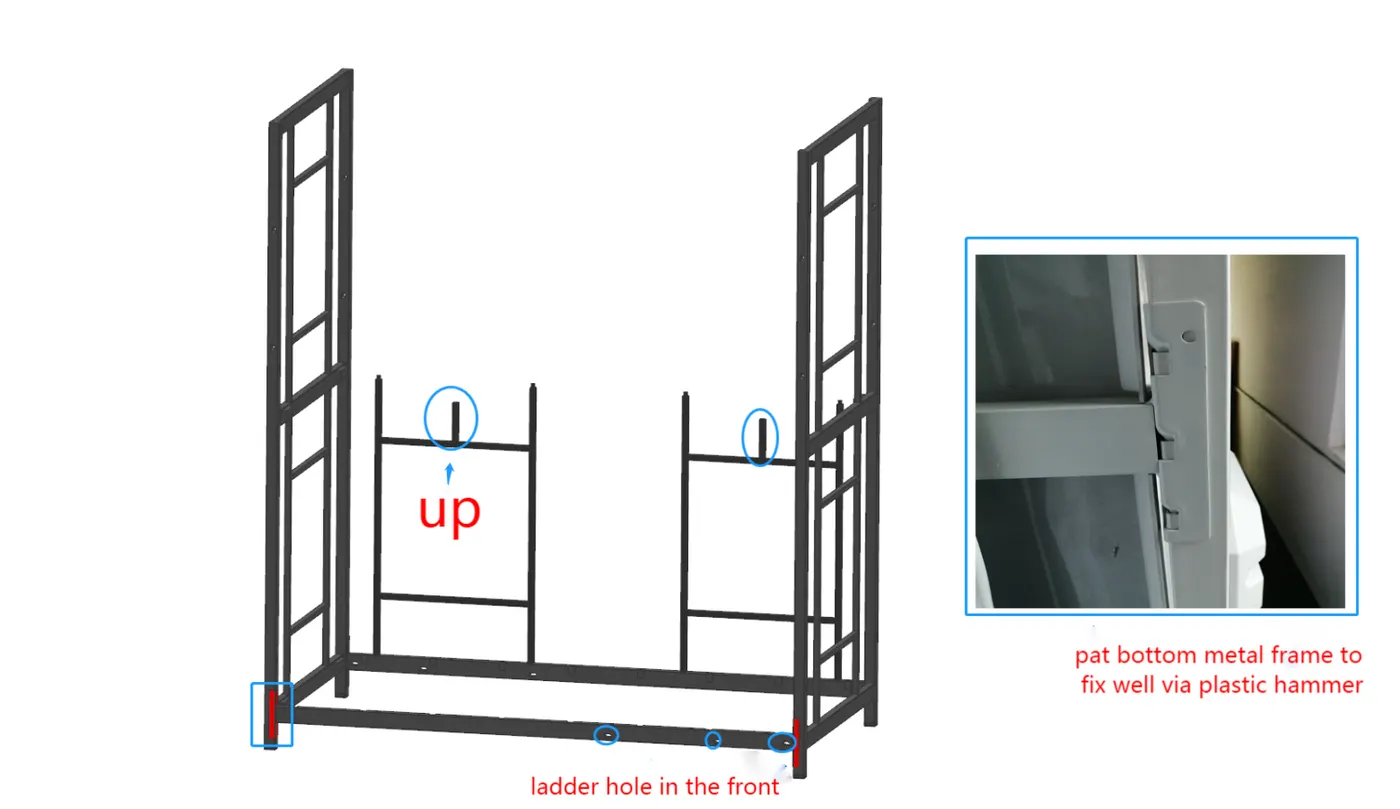
04. Assemble bottom metal frame and H shelf frame
04

Assemble bottom metal frame and H shelf frame

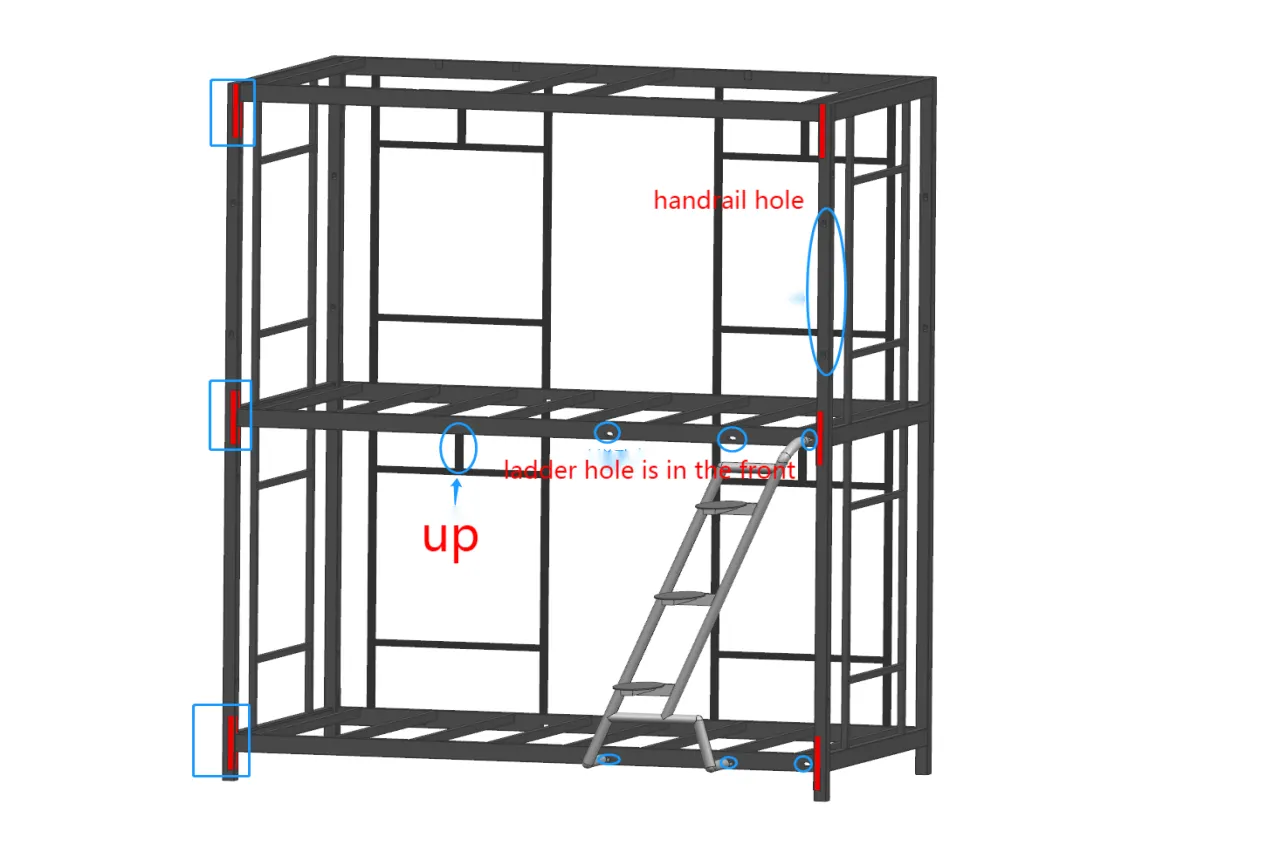
Check the direction shown in the drawing before tightening.
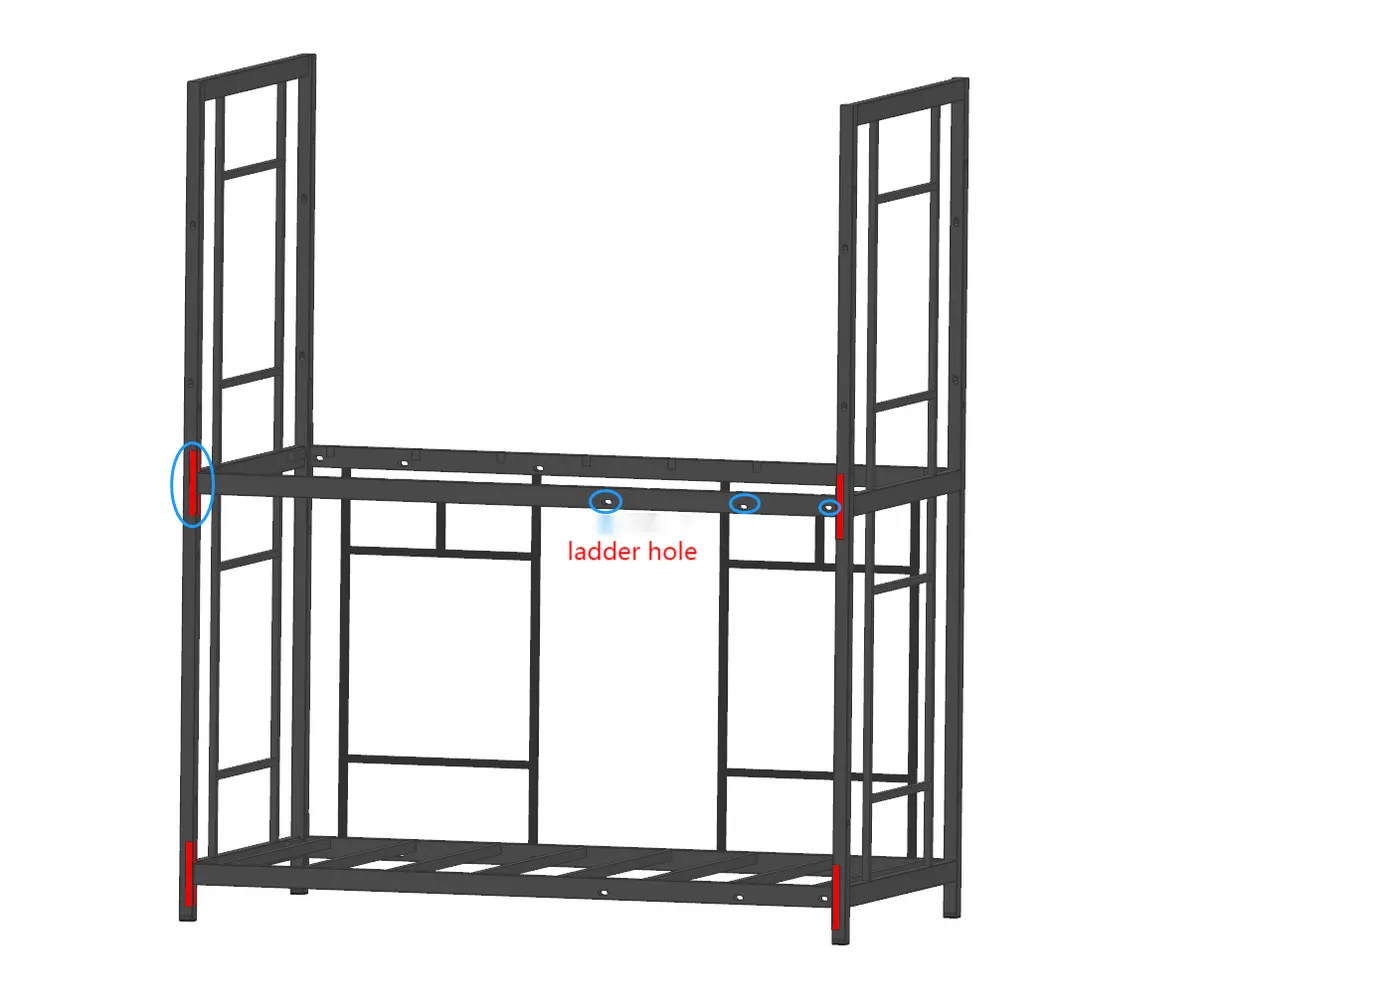
05. Assemble the second bottom frame
05

Assemble the second bottom frame

06. Assemble dresser
06

Assemble dresser

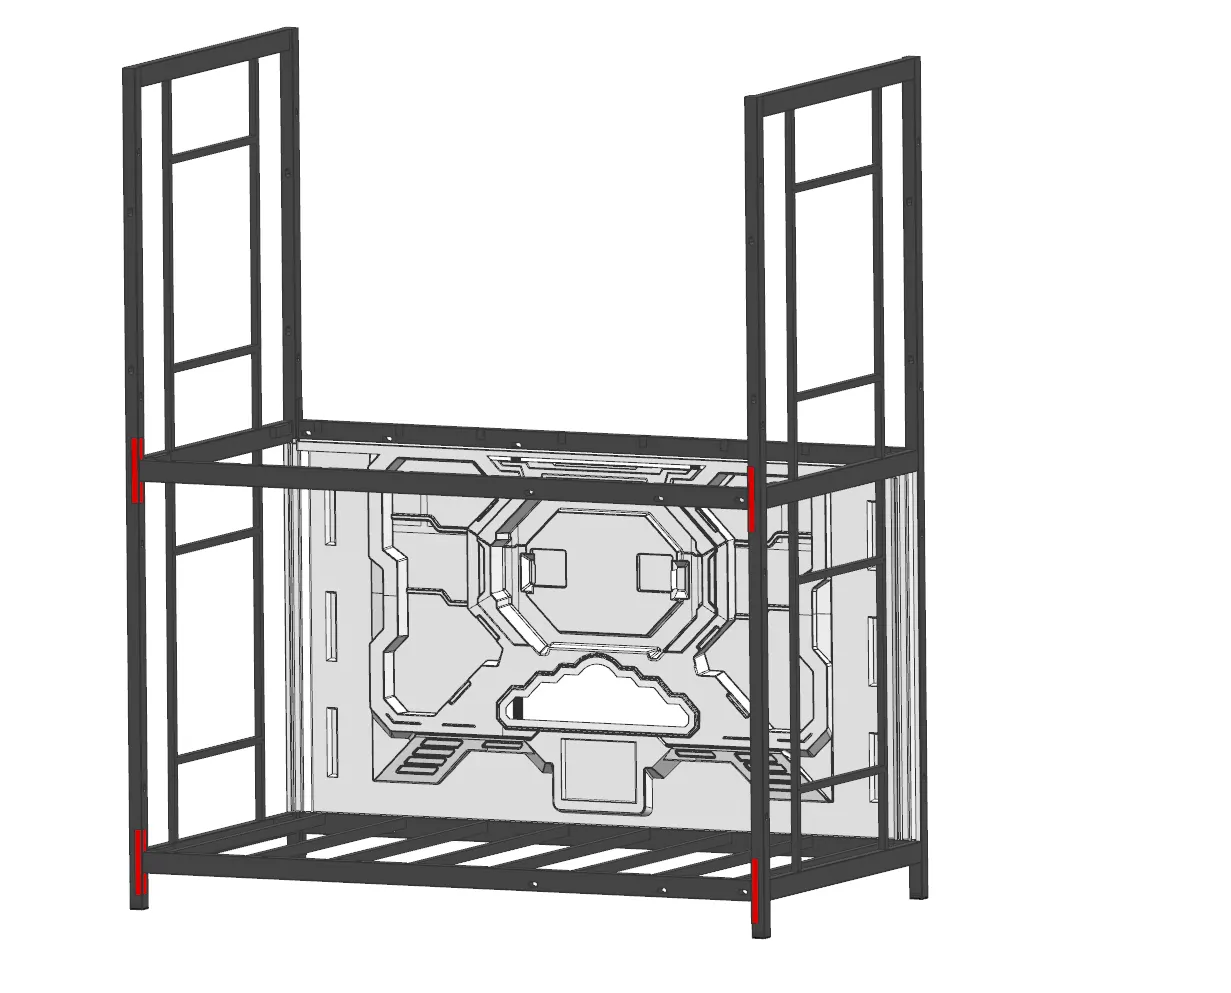
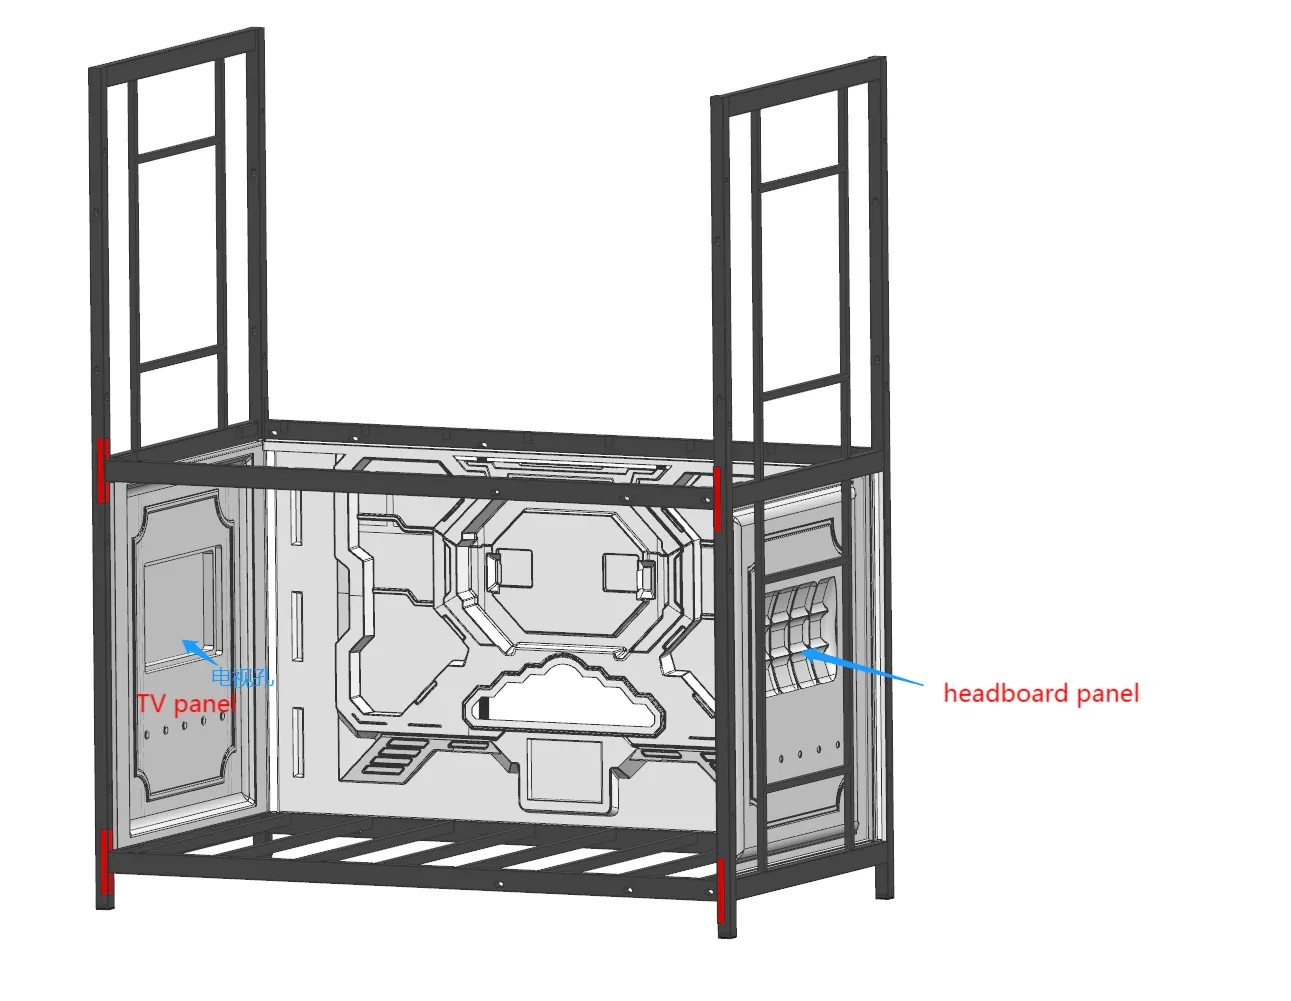
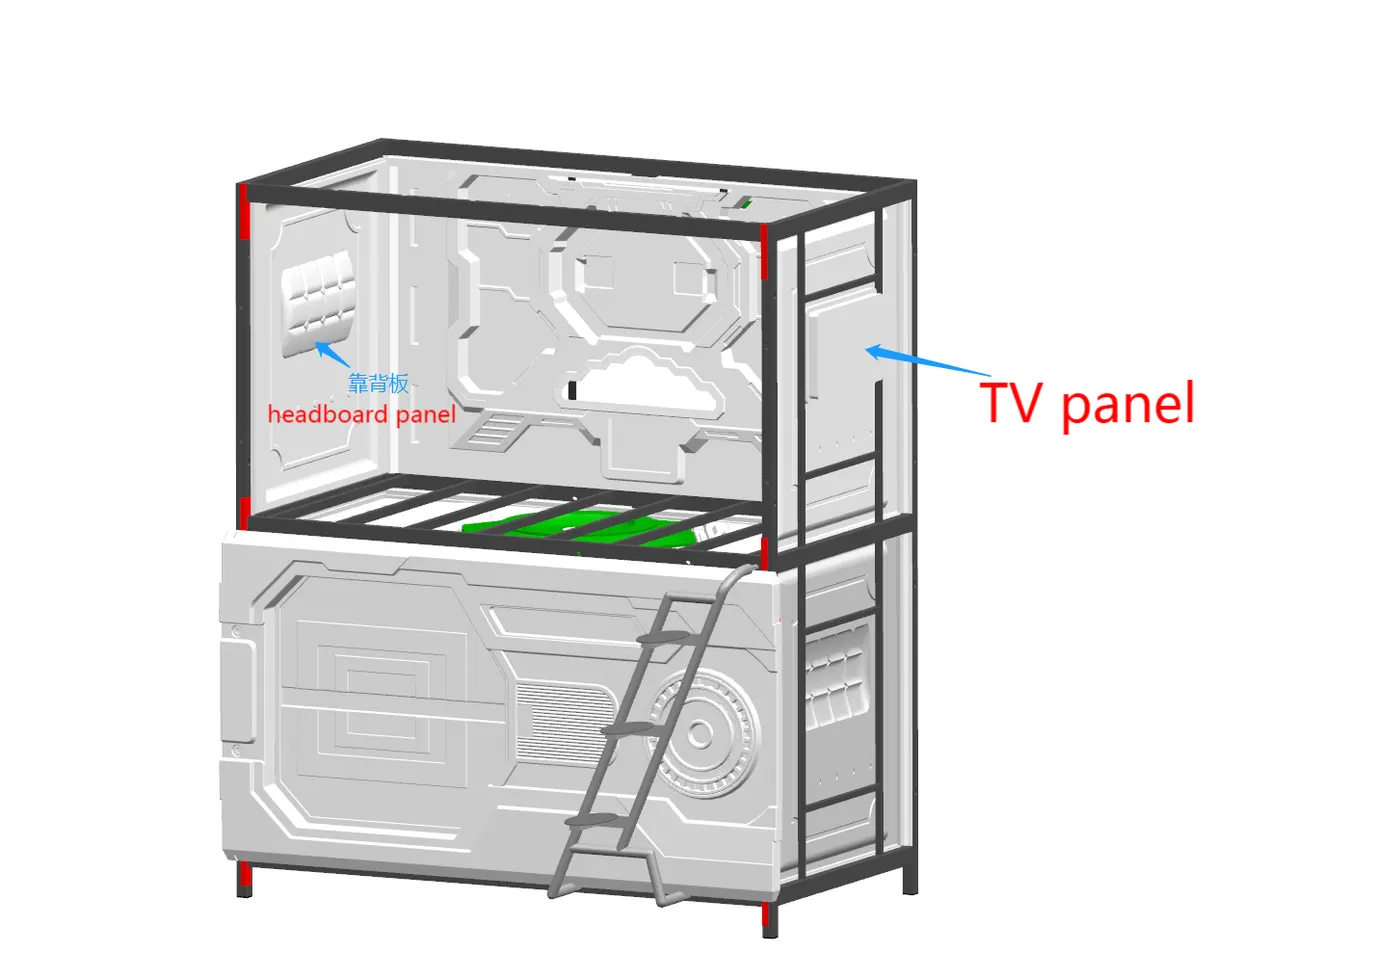
07. Assemble TV back panel
07

Assemble TV back panel

Confirm panel direction before fixing.
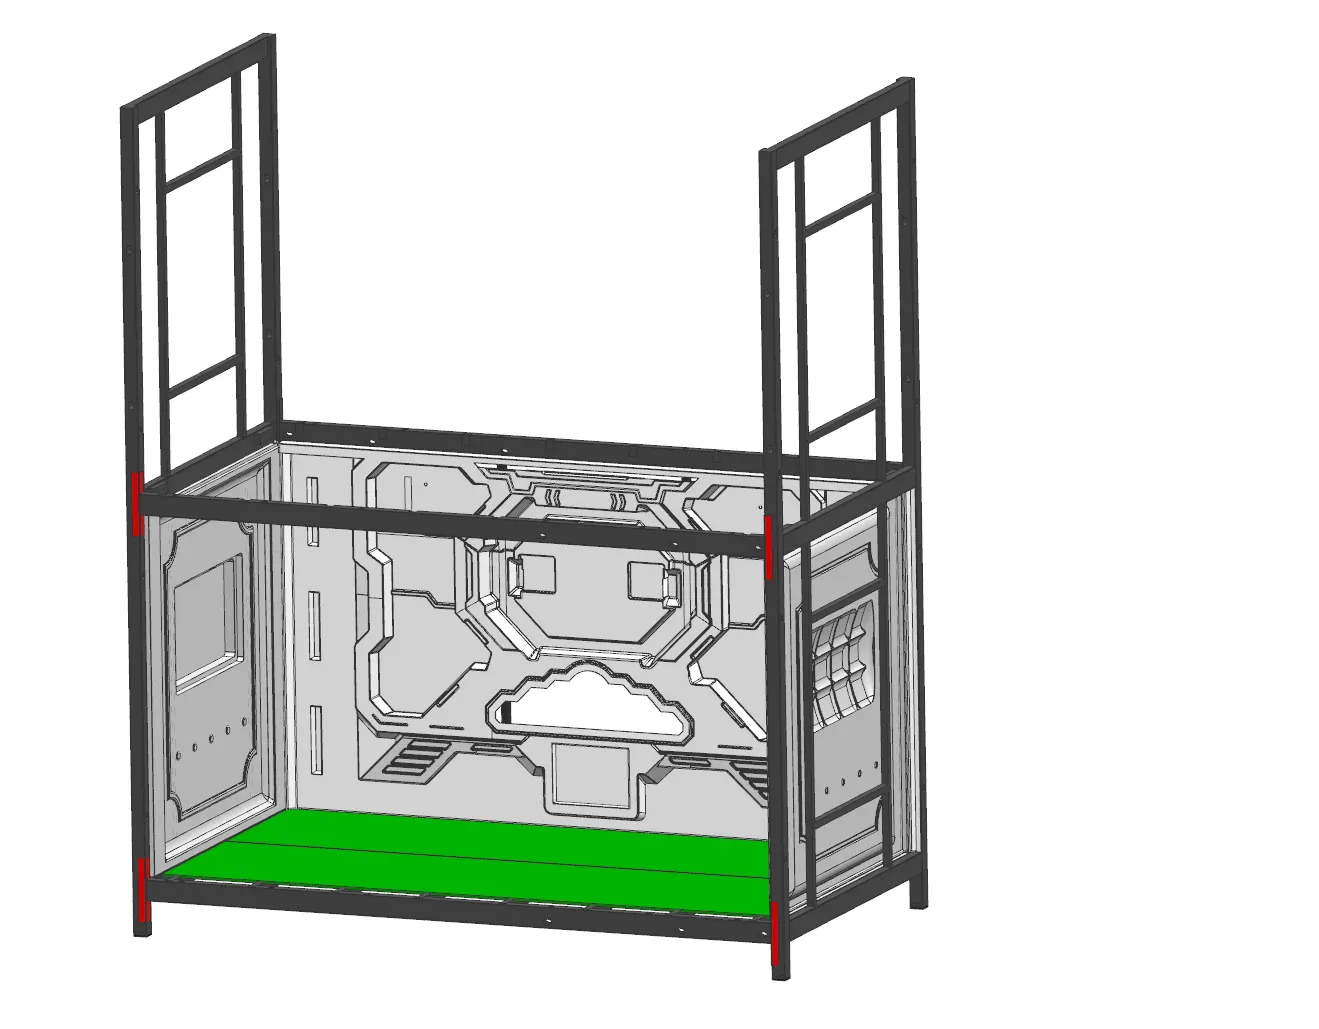
08. Place the bed board on the bottom frame
08

Place the bed board on the bottom frame

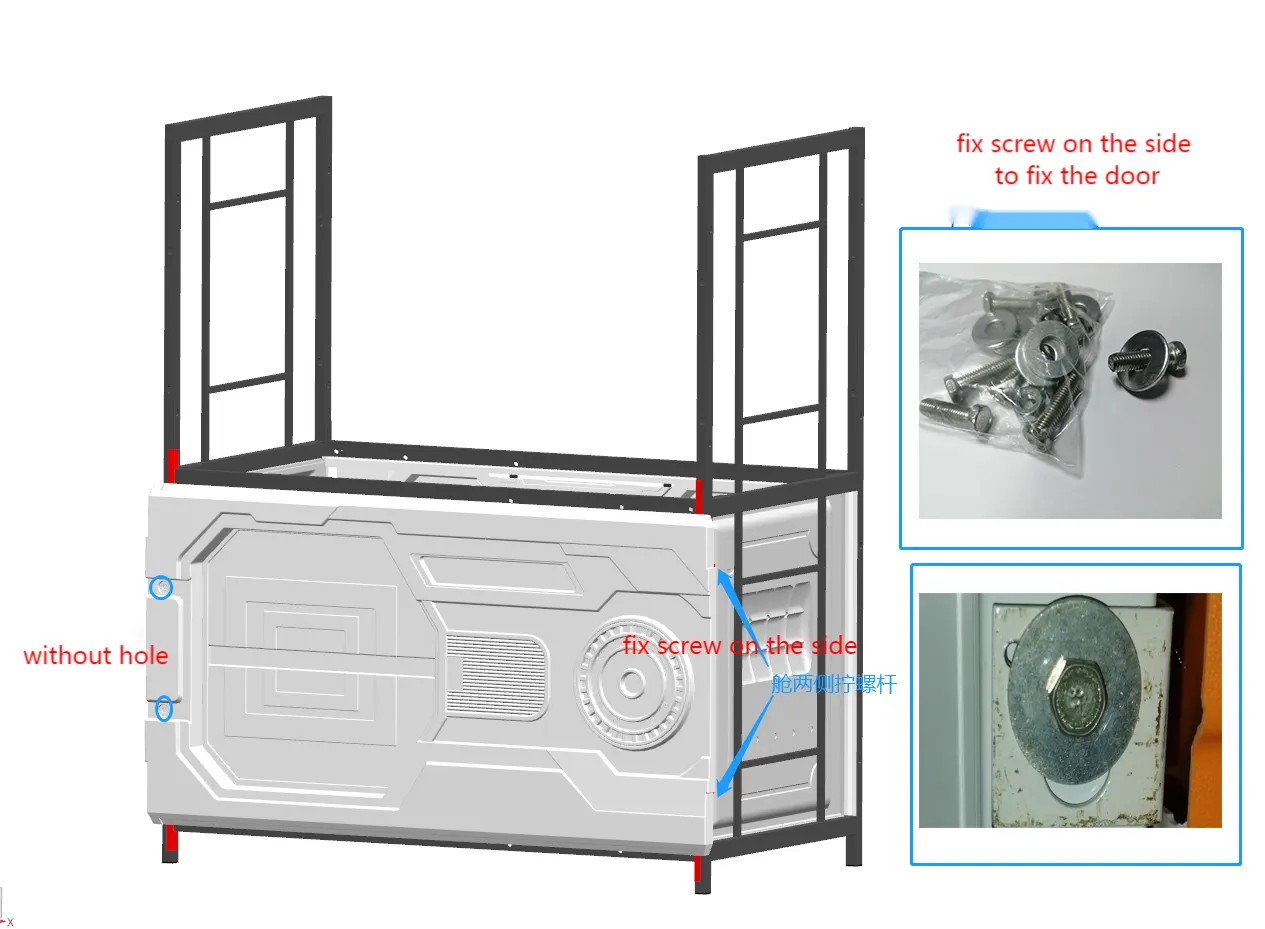
09. Assemble bottom capsule door
09

Assemble bottom capsule door

Top and bottom doors are different. Match the correct door before installation.
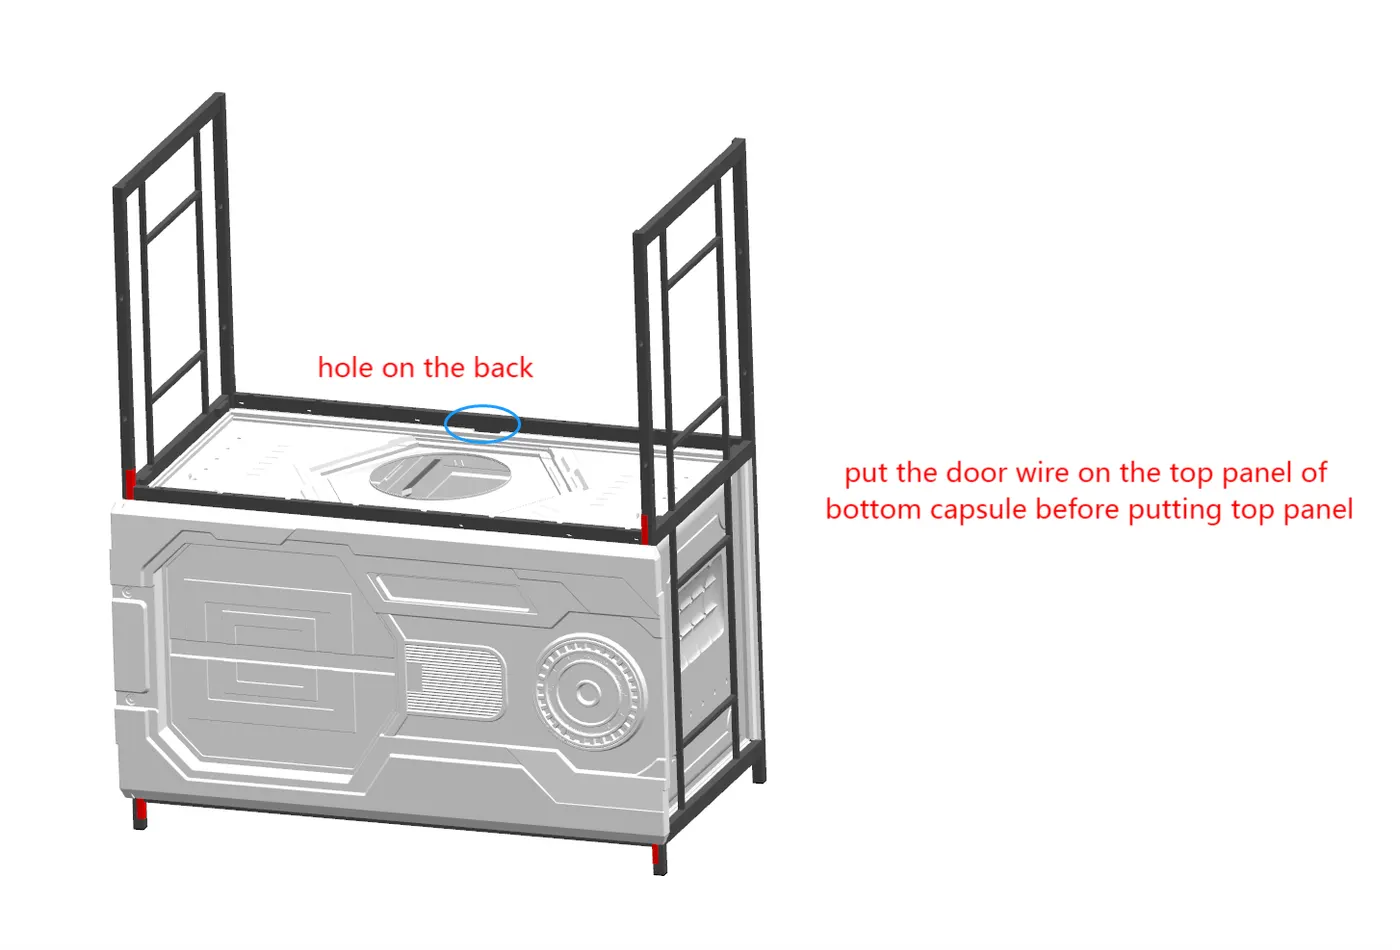
10. Assemble top panel for bottom capsule
10

Assemble top panel for bottom capsule

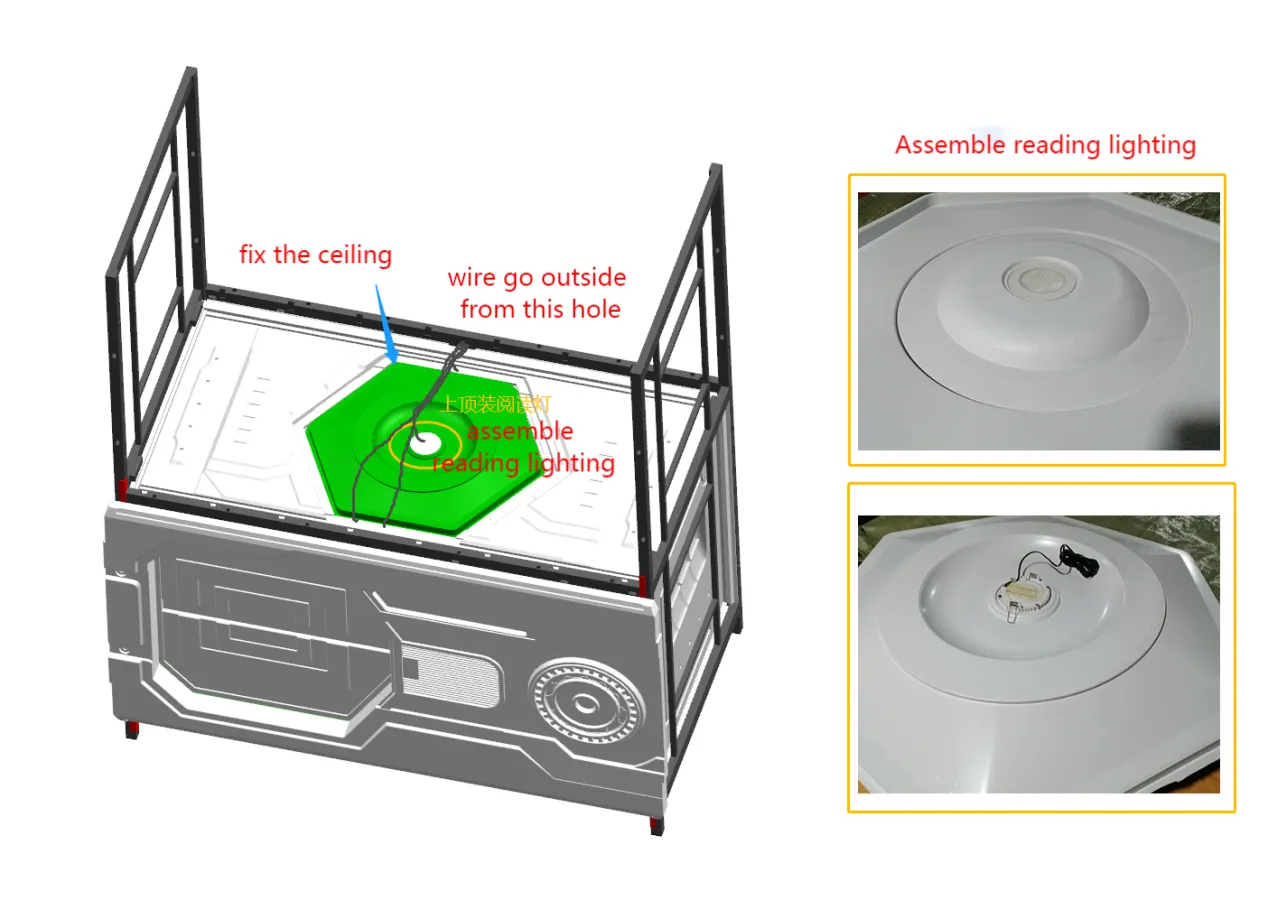
11. Assemble top ceiling for bottom capsule
11

Assemble top ceiling for bottom capsule

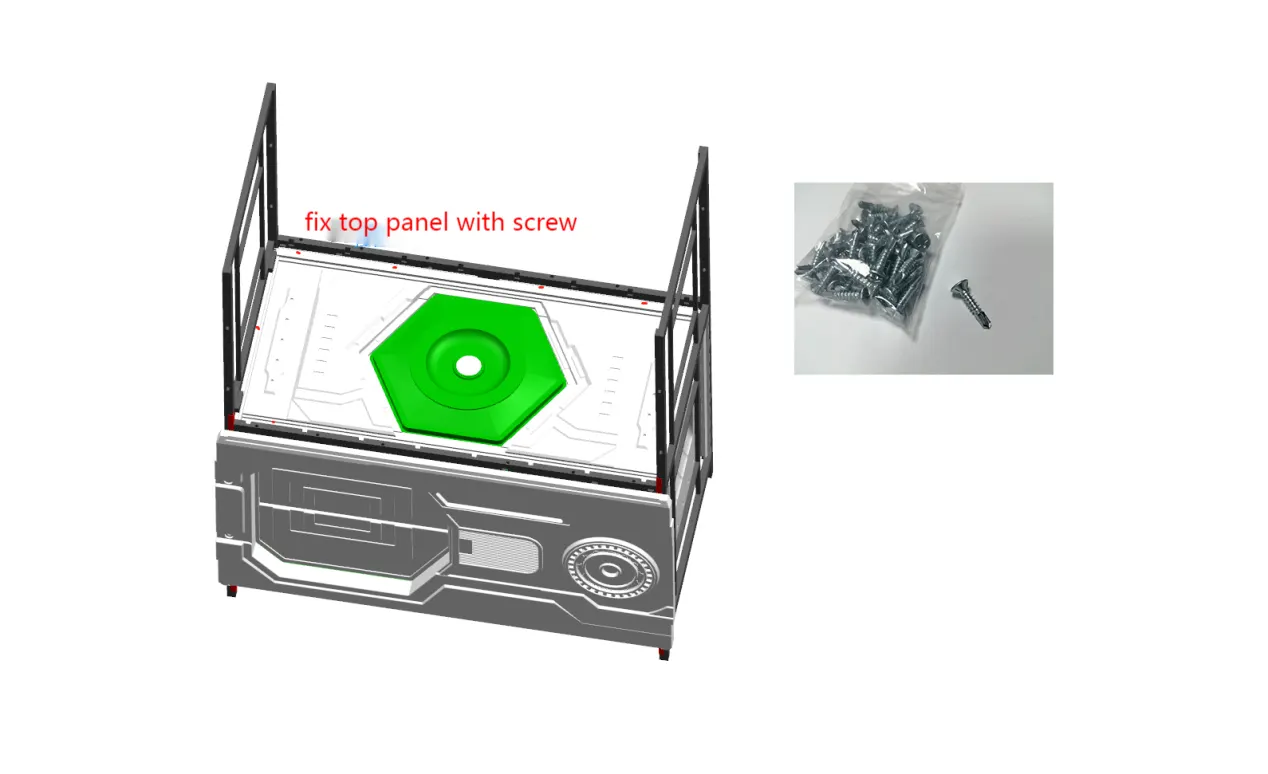
12. Fix top panel of bottom capsule
12

Fix top panel of bottom capsule

Installation phase

Top capsule

9 steps
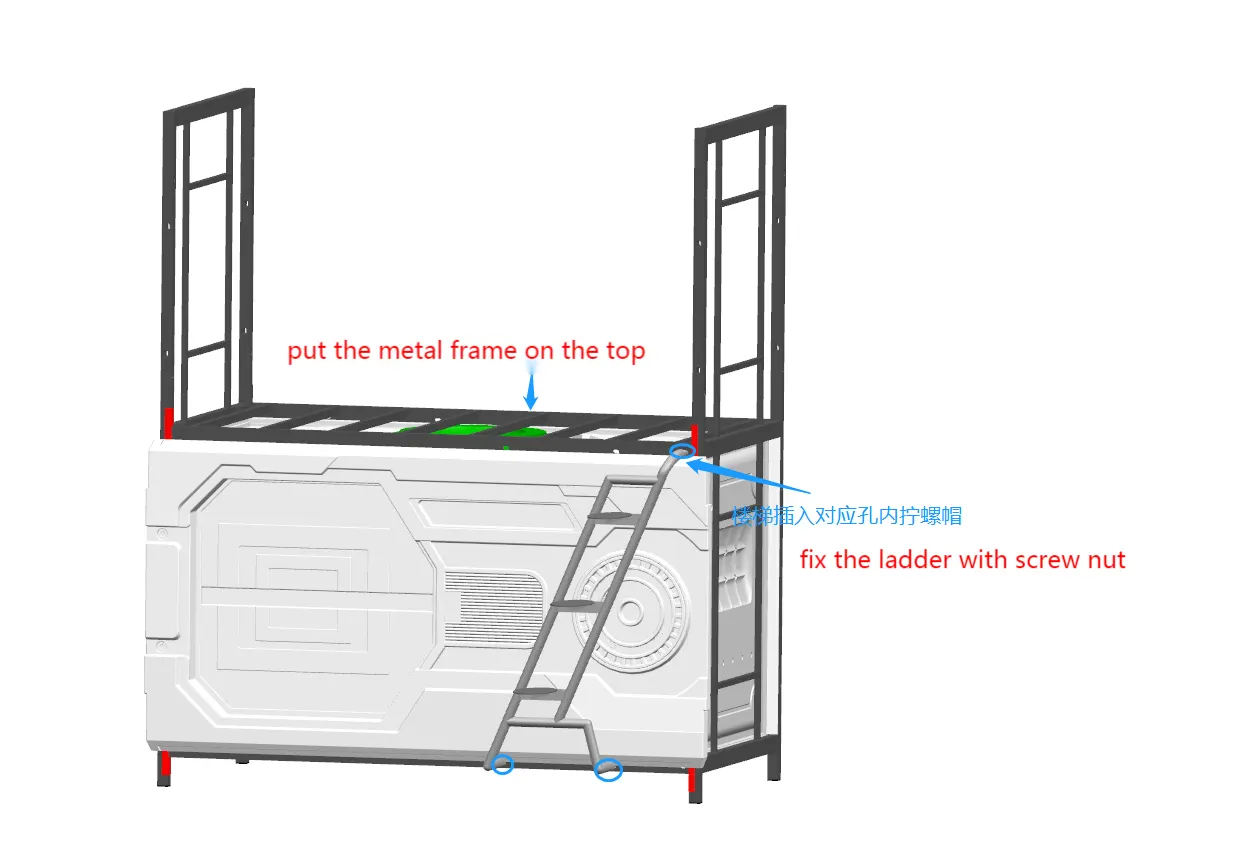
13. Assemble ladder
13

Assemble ladder

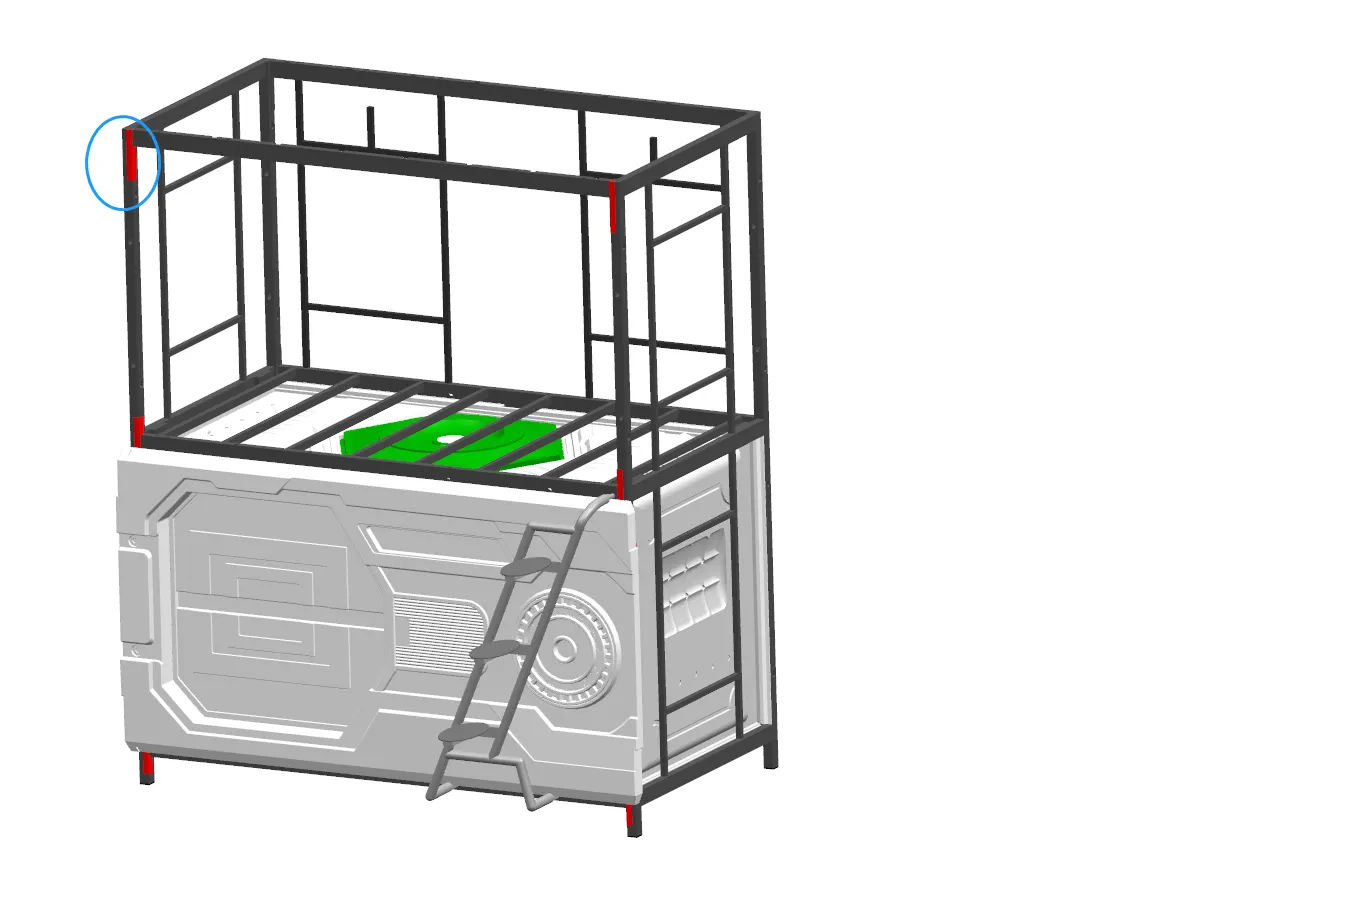
14. Assemble frame of top capsule
14

Assemble frame of top capsule

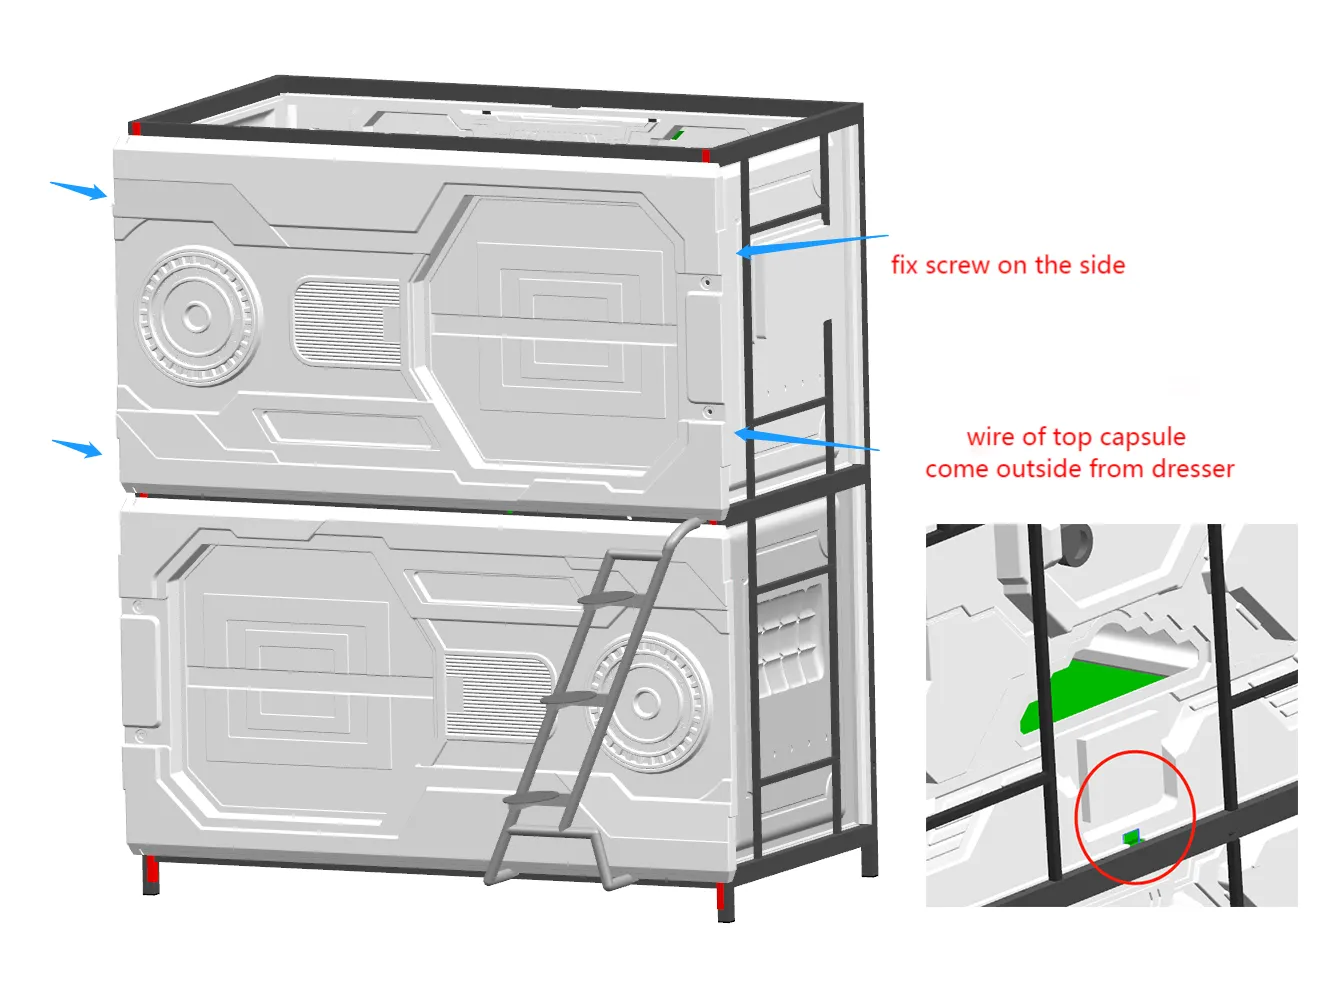
15. Assemble dresser and TV back panel for top capsule
15

Assemble dresser and TV back panel for top capsule

Check the shown direction before final fixing.
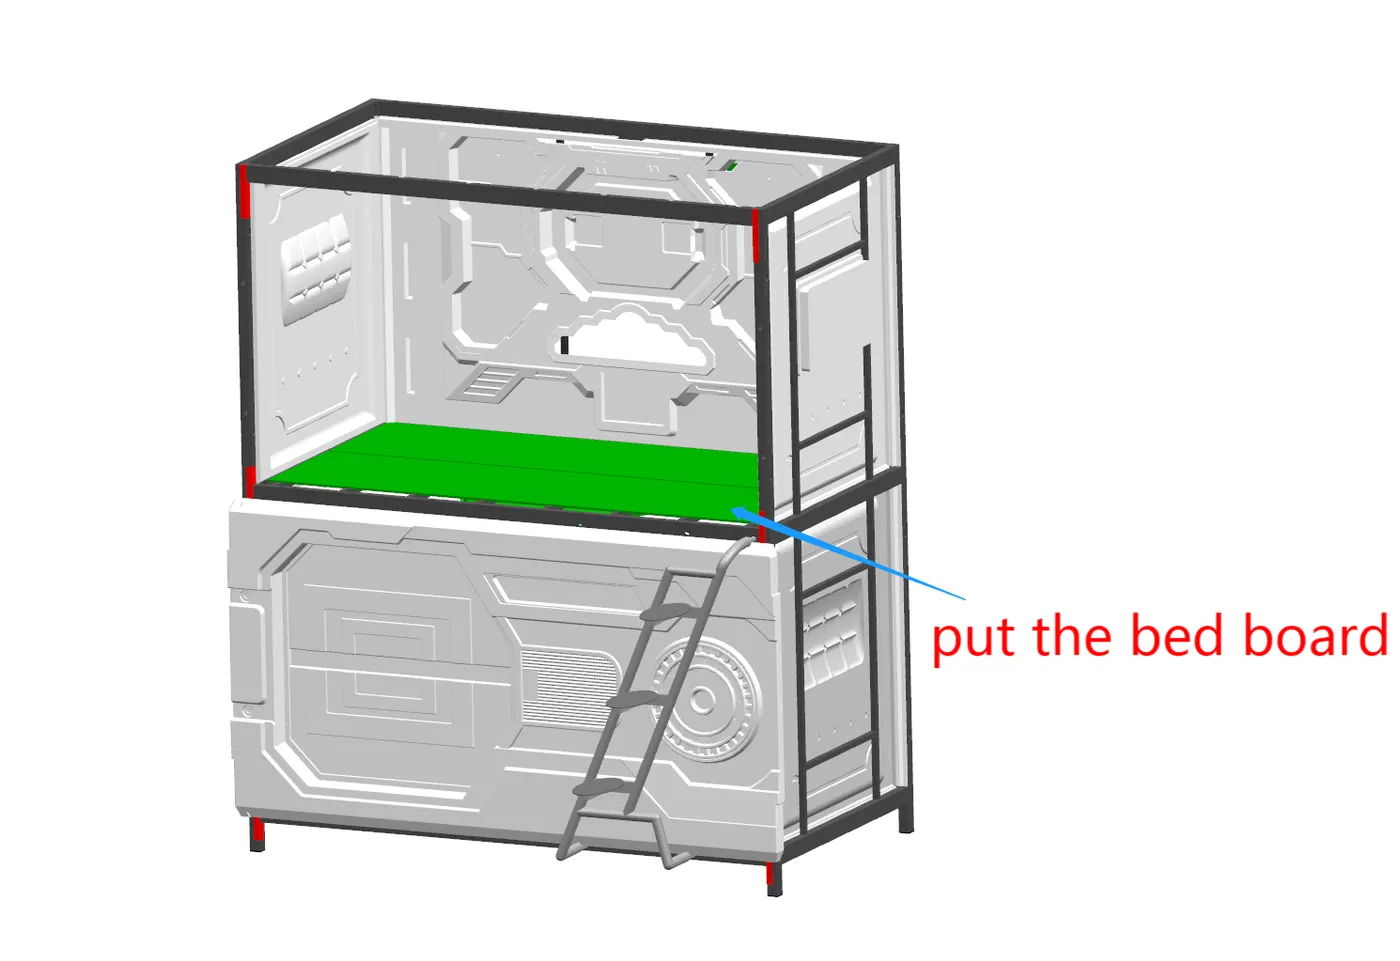
16. Place bed board for top capsule
16

Place bed board for top capsule

17. Assemble the top capsule door
17

Assemble the top capsule door

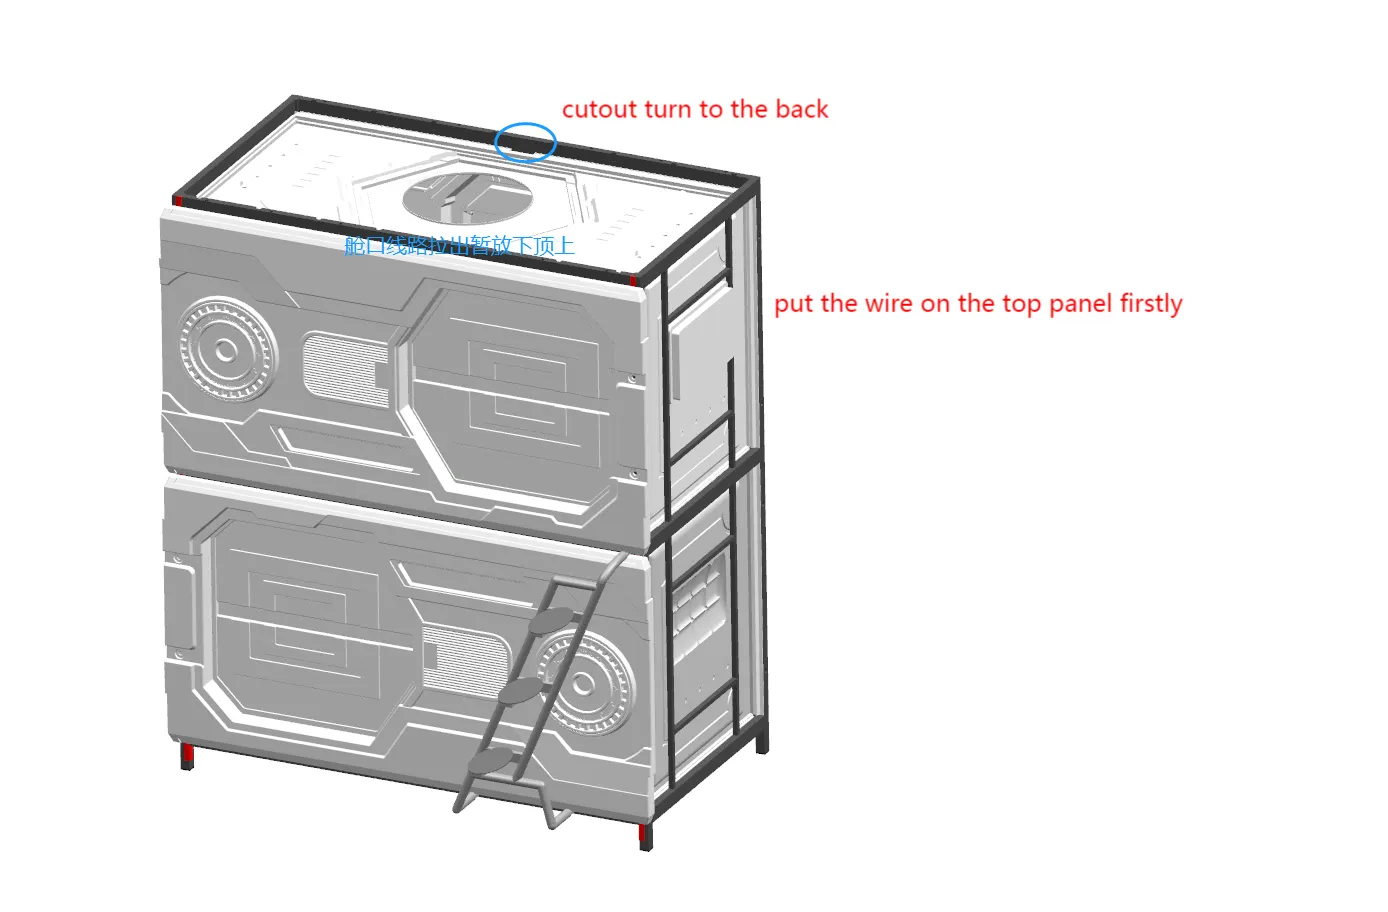
18. Assemble top panel of top capsule
18

Assemble top panel of top capsule

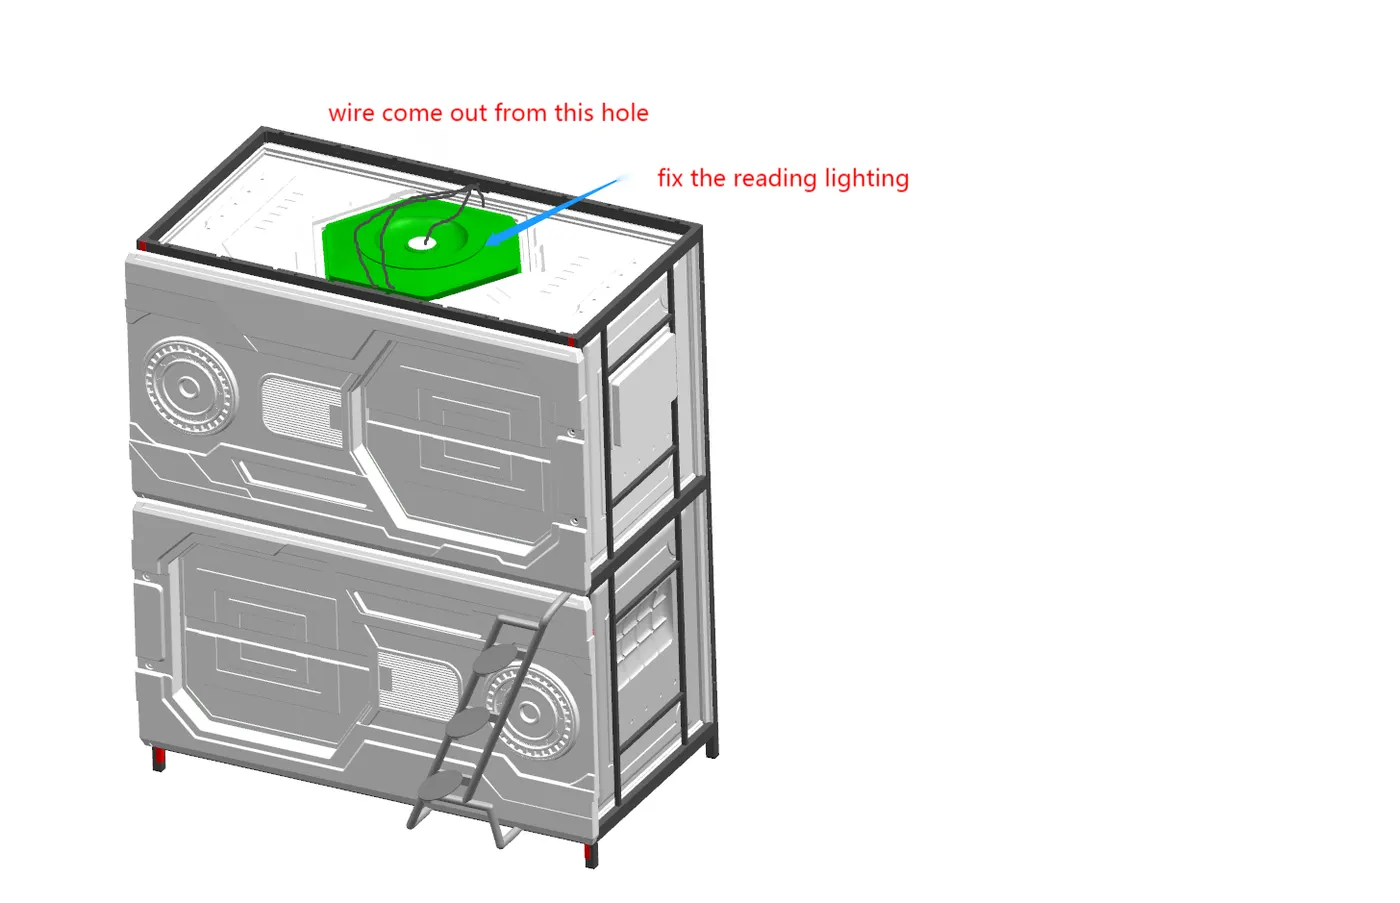
19. Assemble top ceiling of top capsule
19

Assemble top ceiling of top capsule

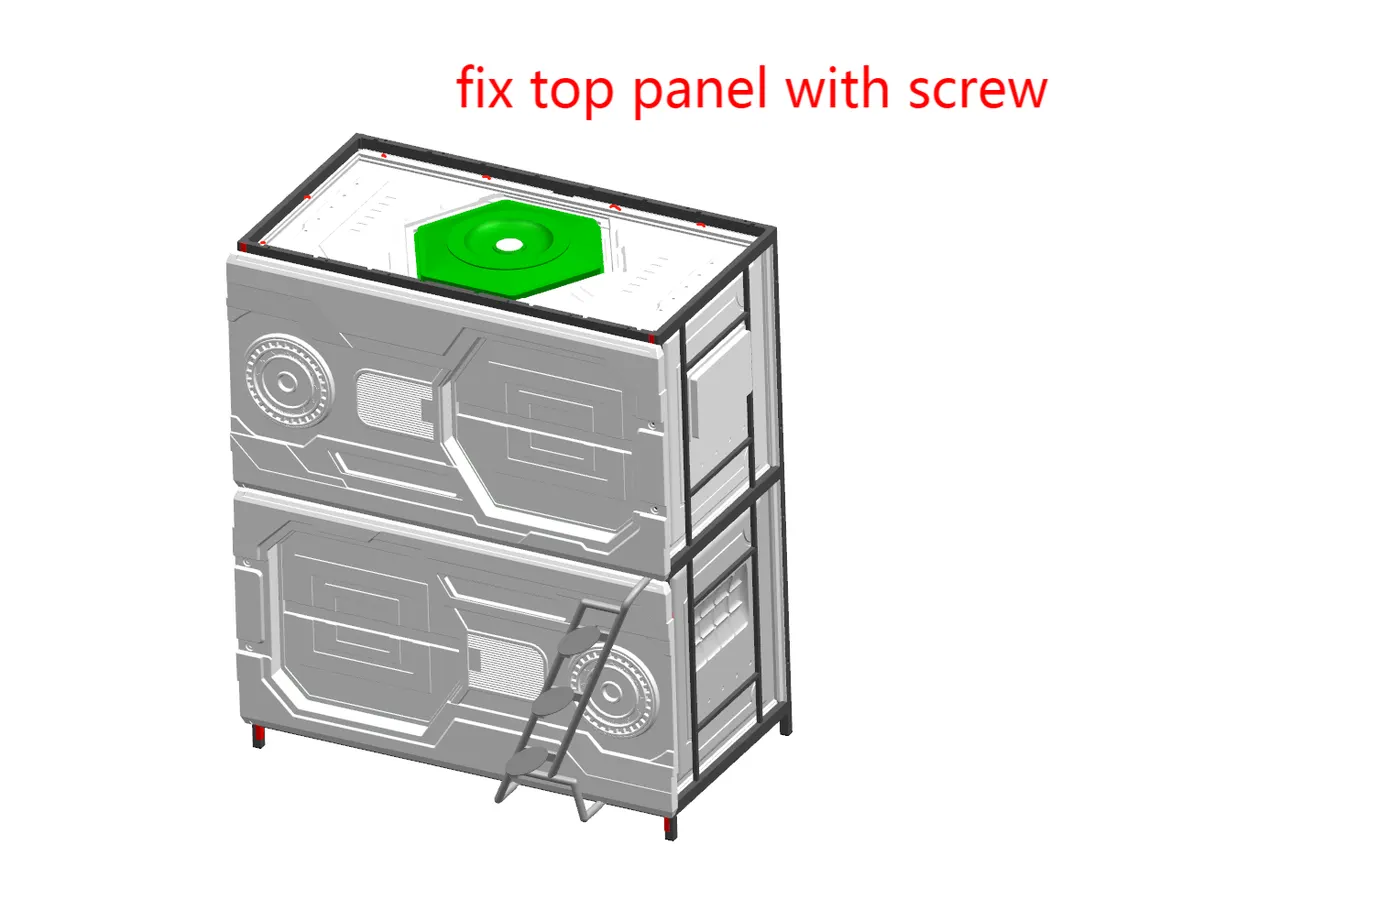
20. Fix top panel of top capsule
20

Fix top panel of top capsule

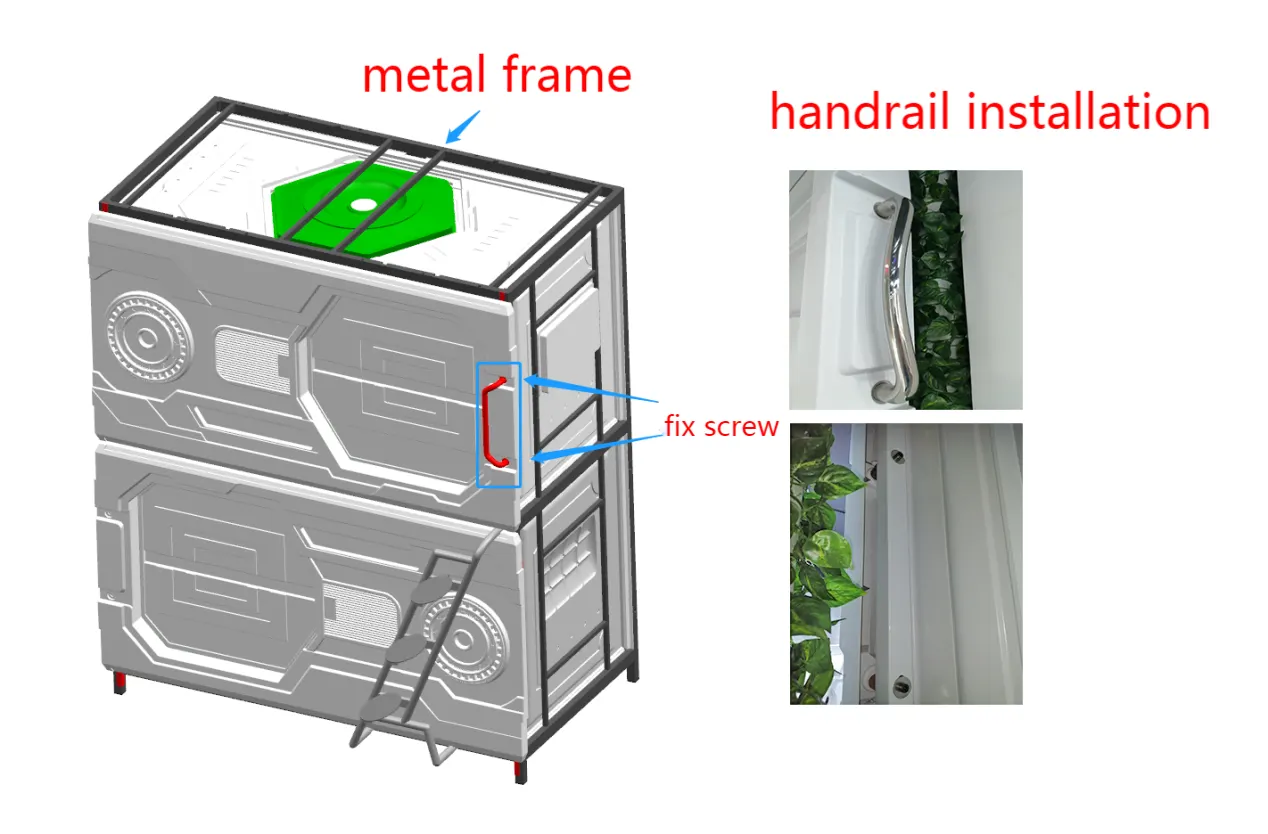
21. Assemble handrail
21

Assemble handrail

Installation phase

Accessories and services

17 steps
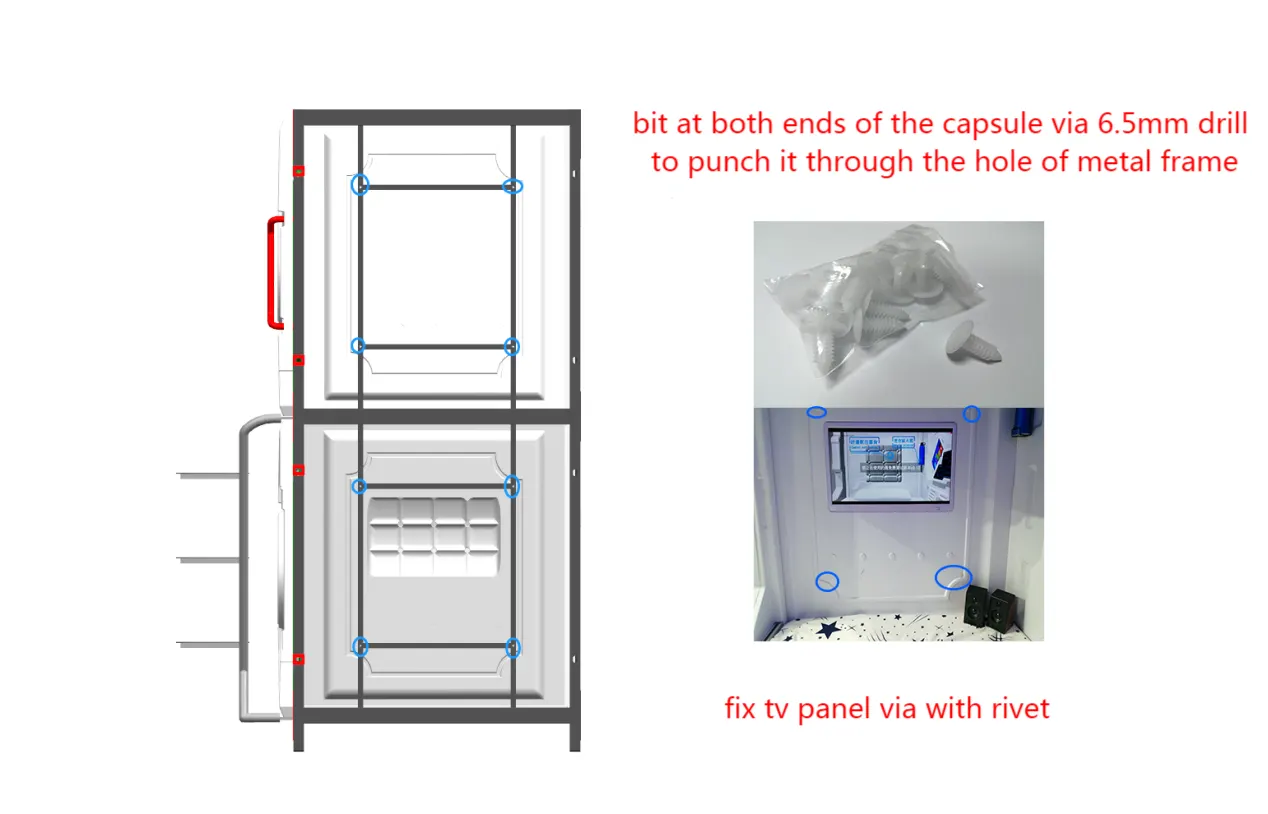
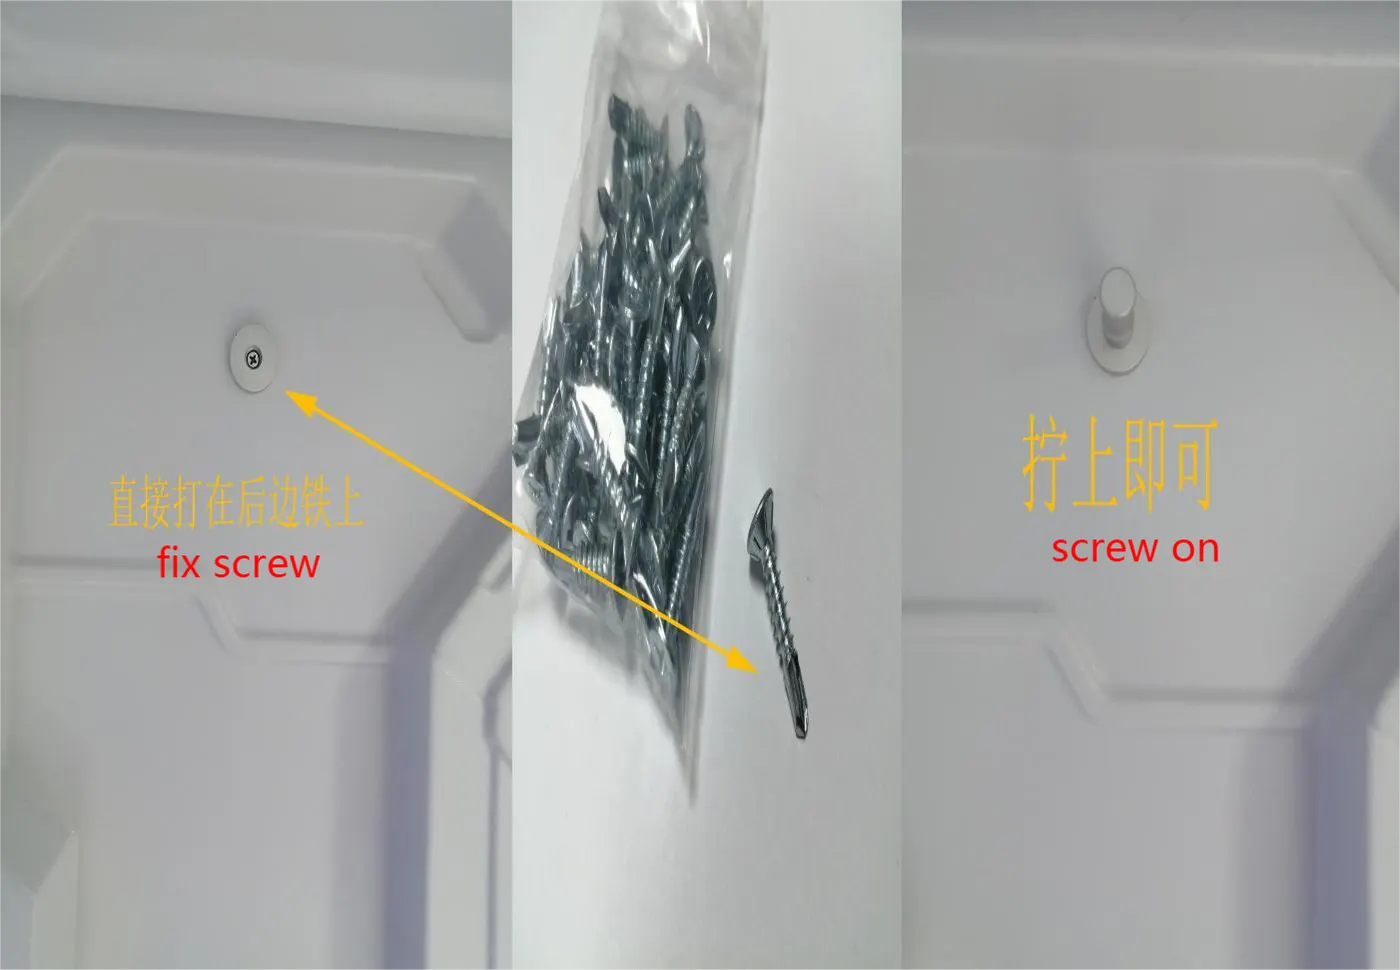
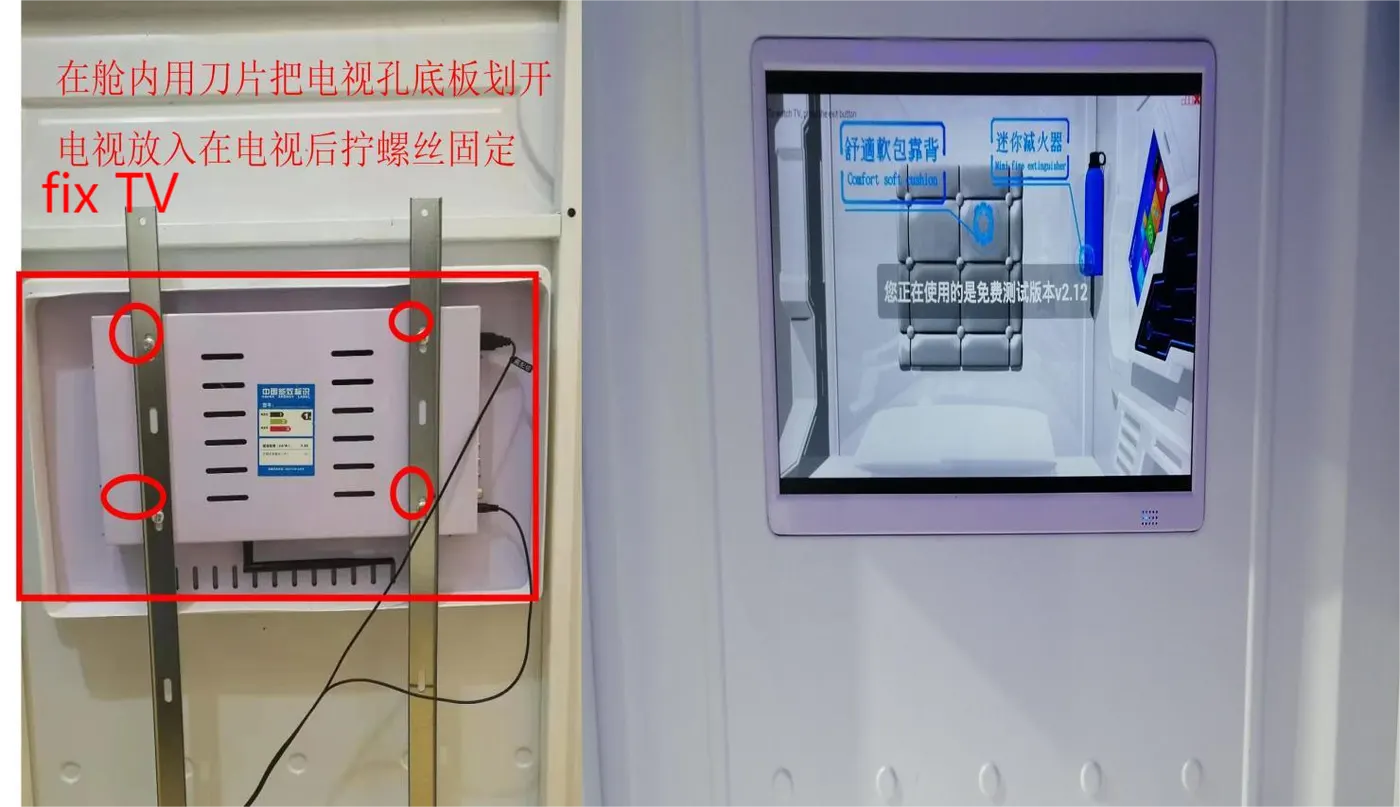
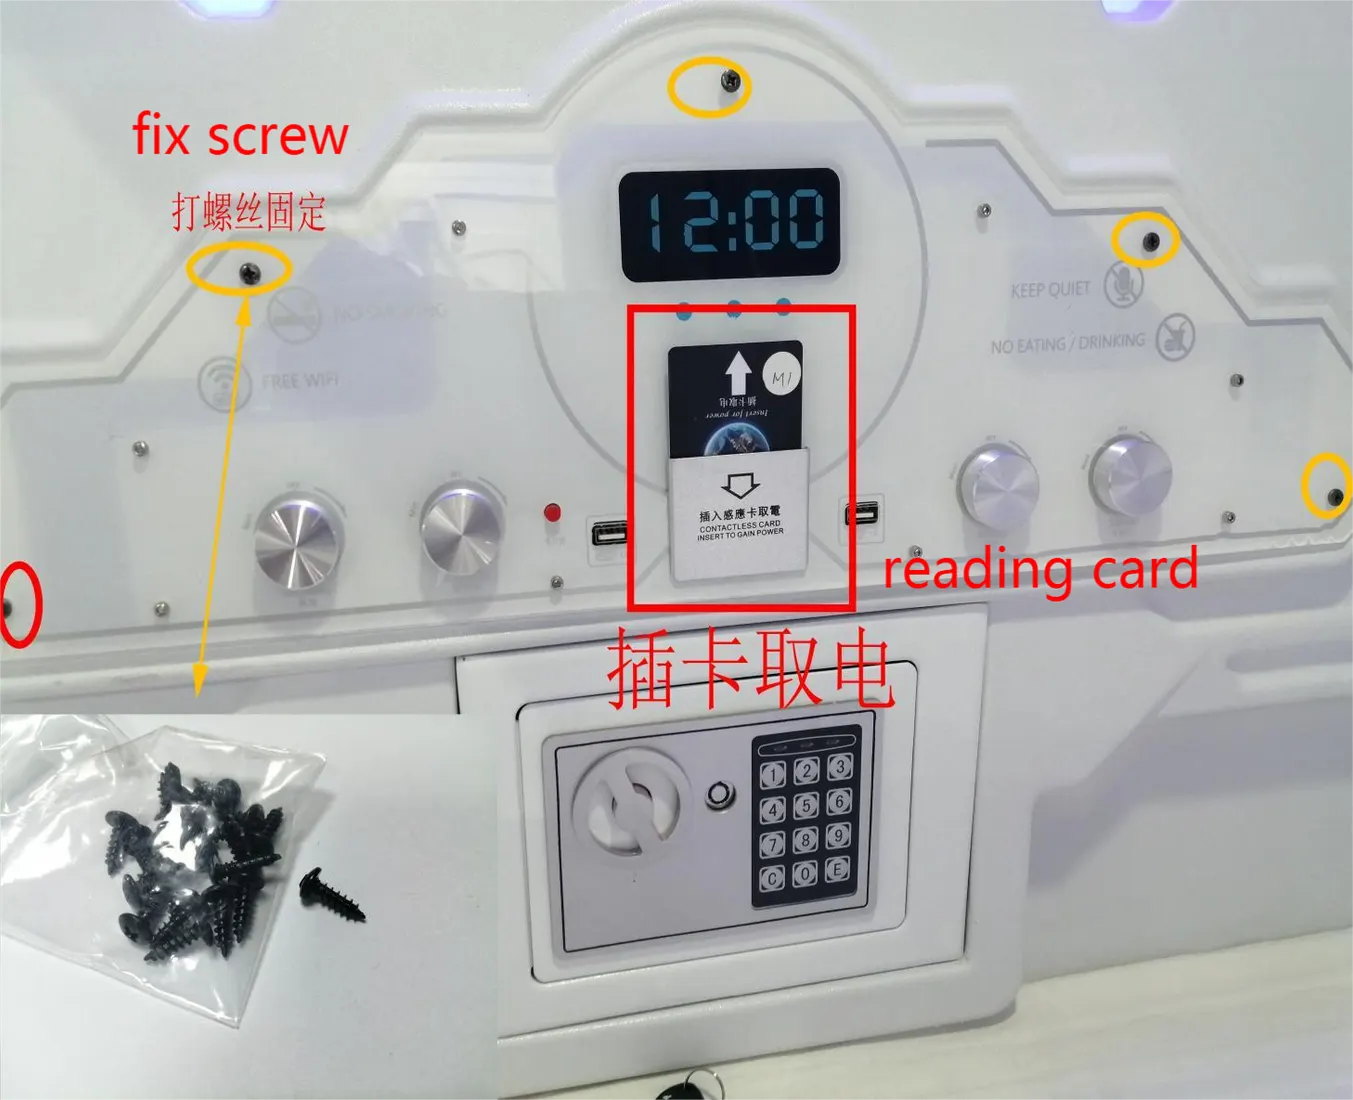
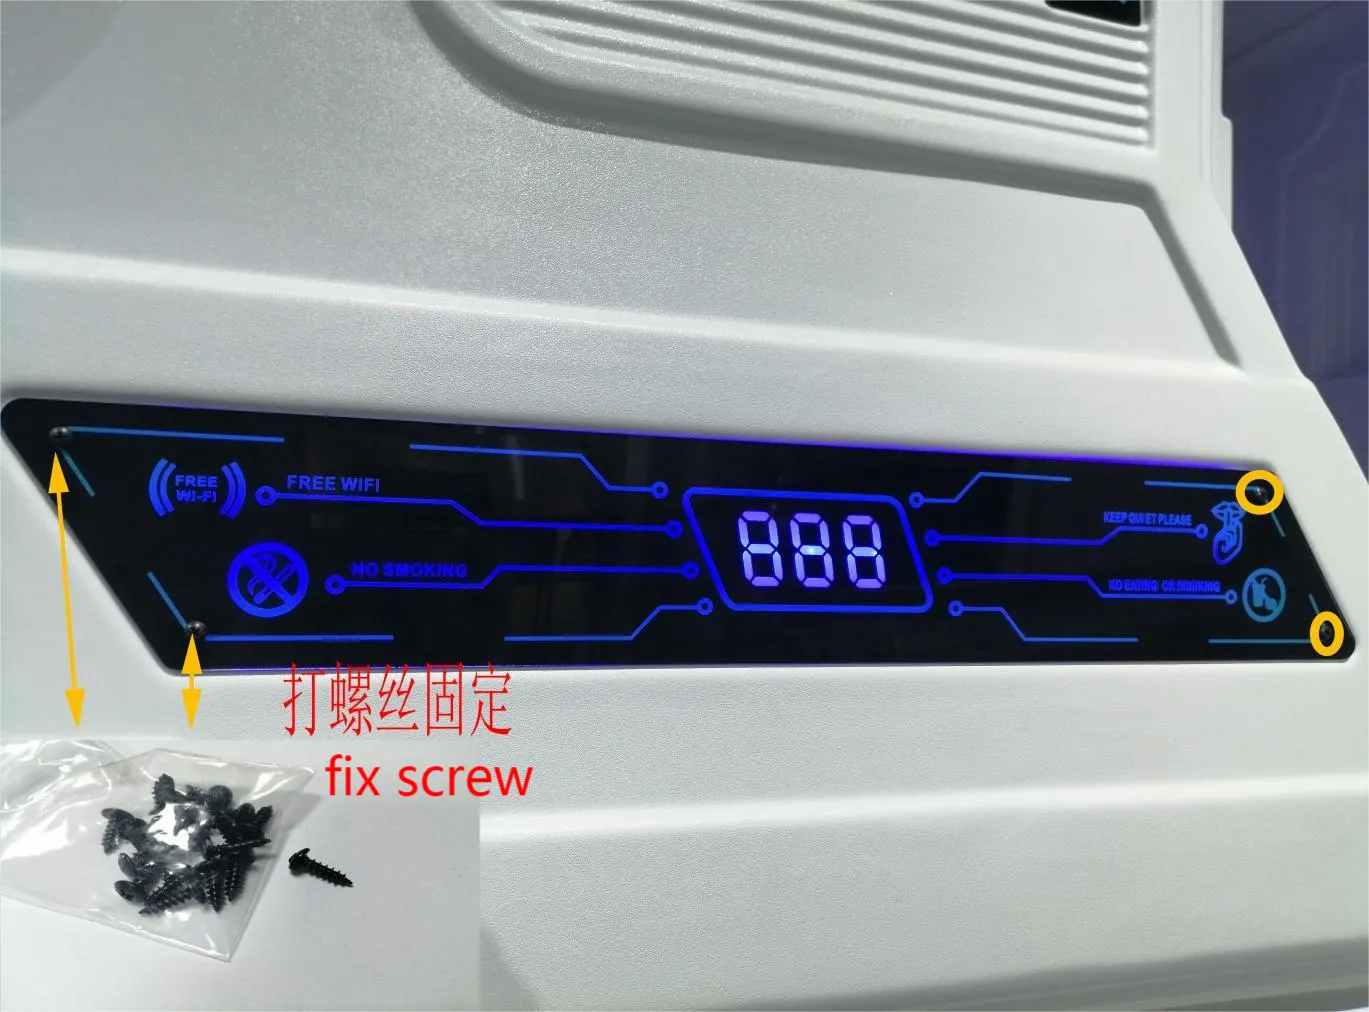
22. Fix TV panel with rivets
22

Fix TV panel with rivets

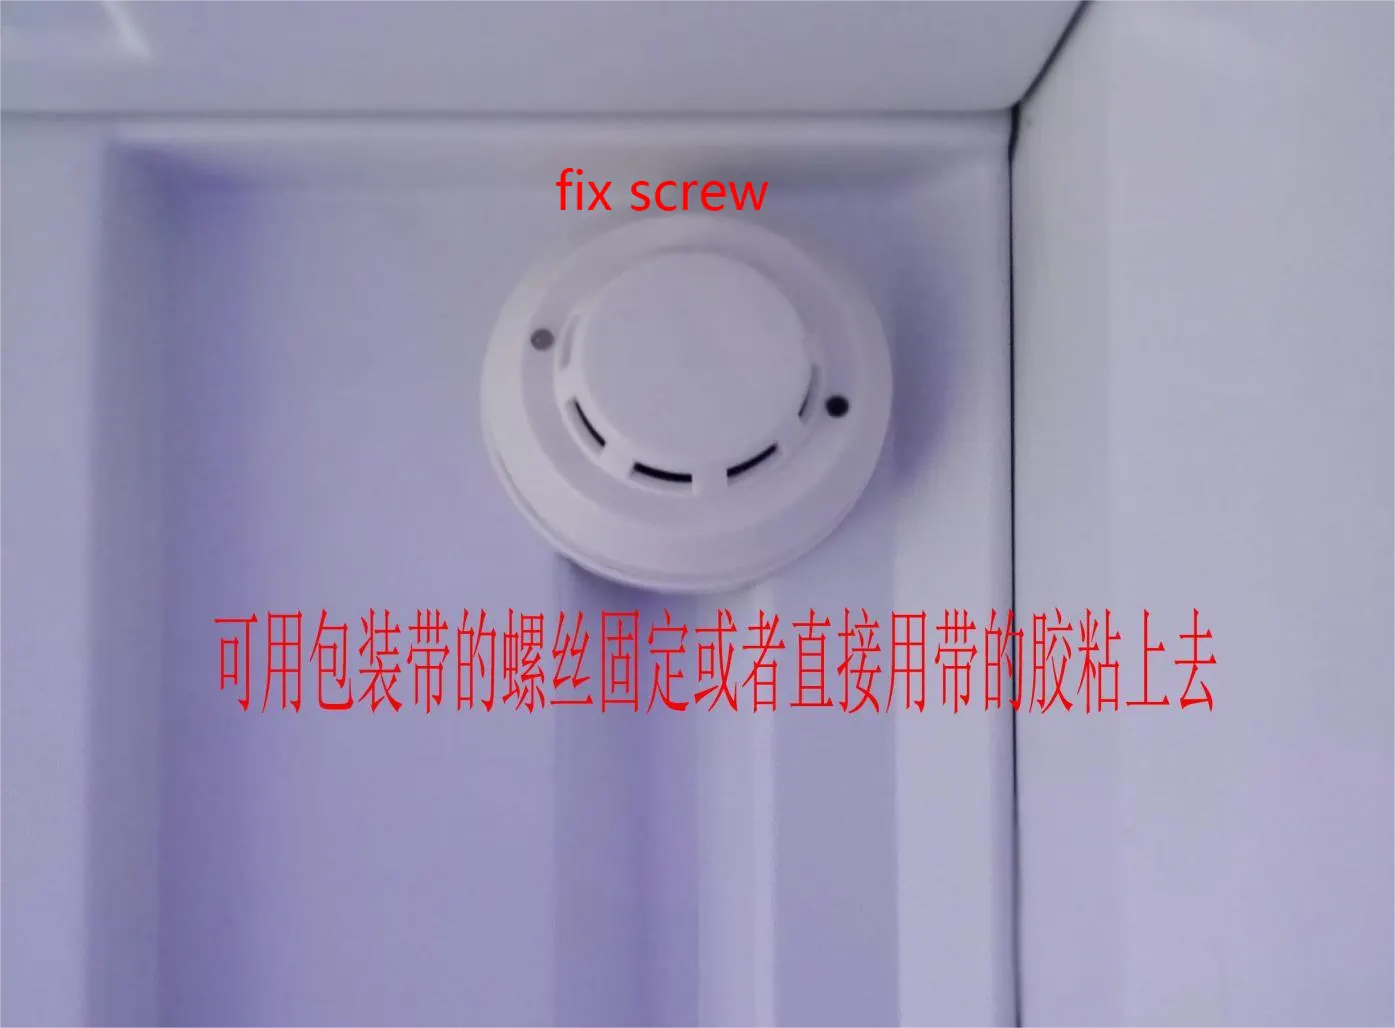
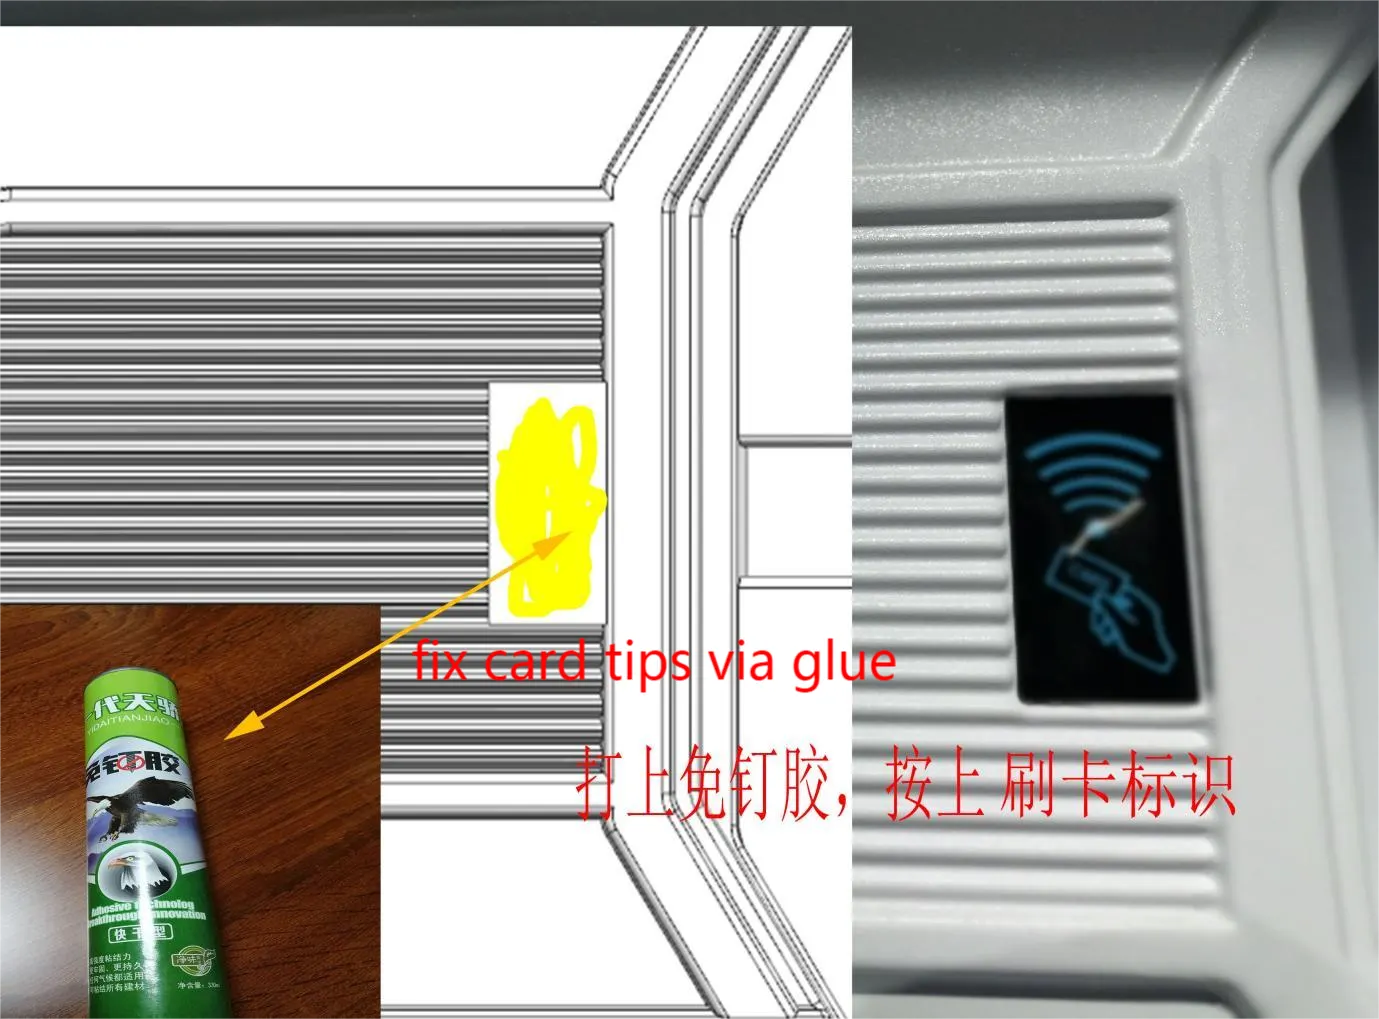
23. Install small equipment
23

Install small equipment

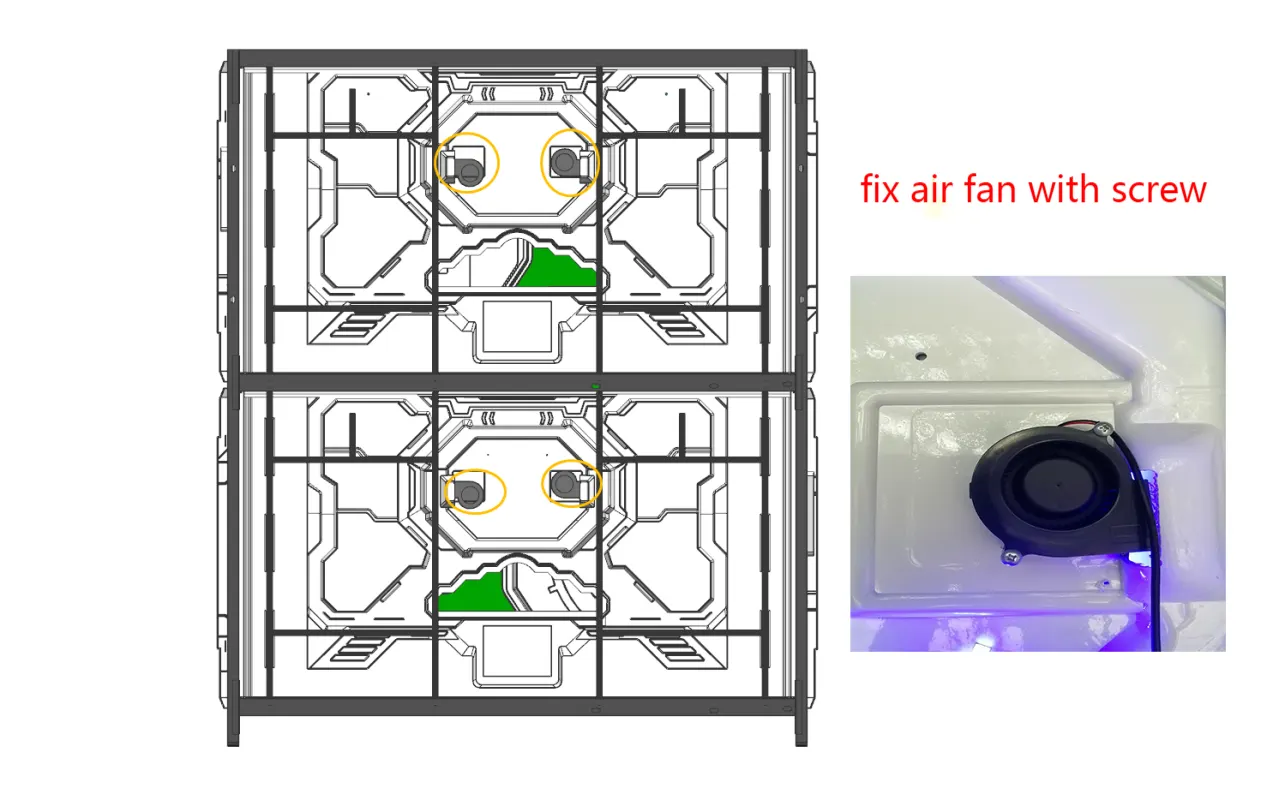
24. Assemble air fan
24

Assemble air fan

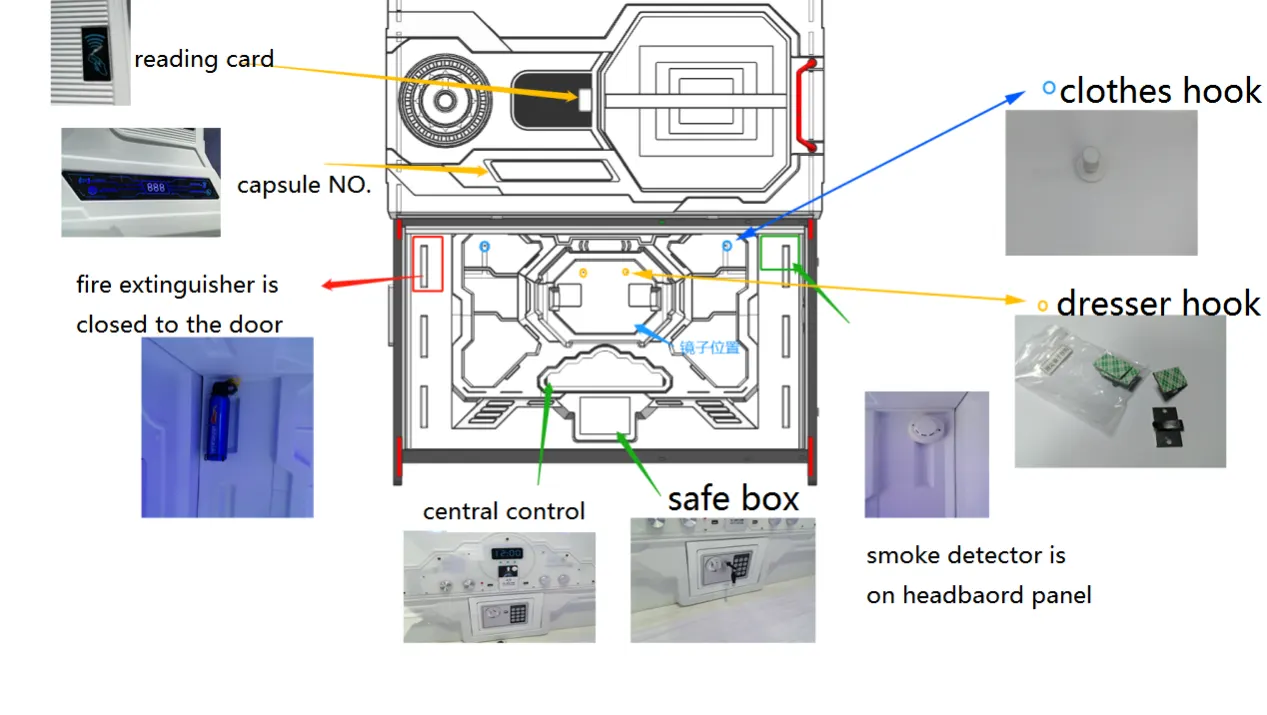
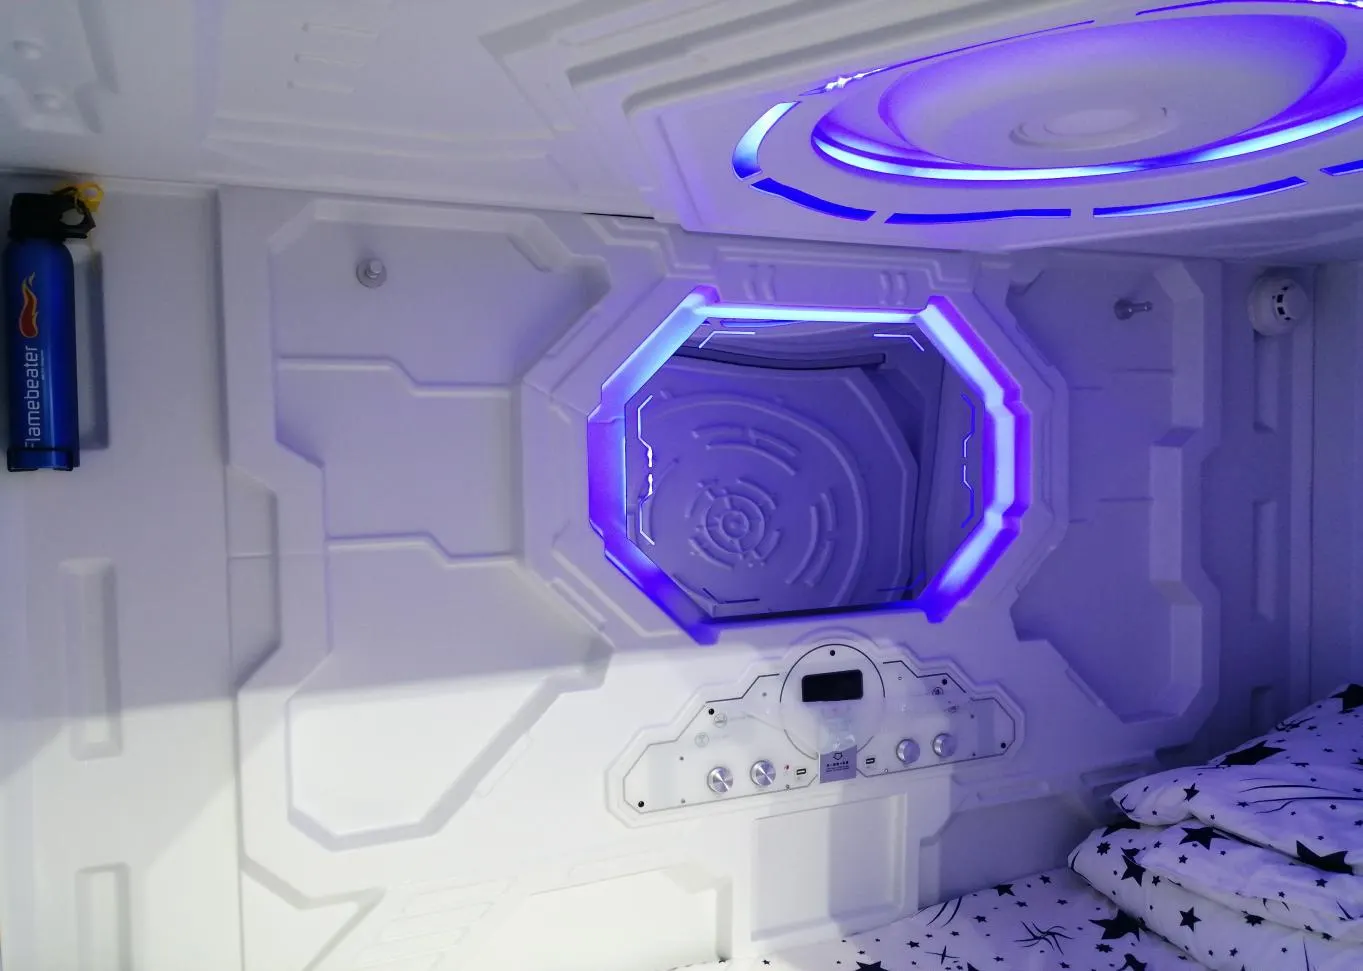
25. Check capsule accessory layout
25

Check capsule accessory layout

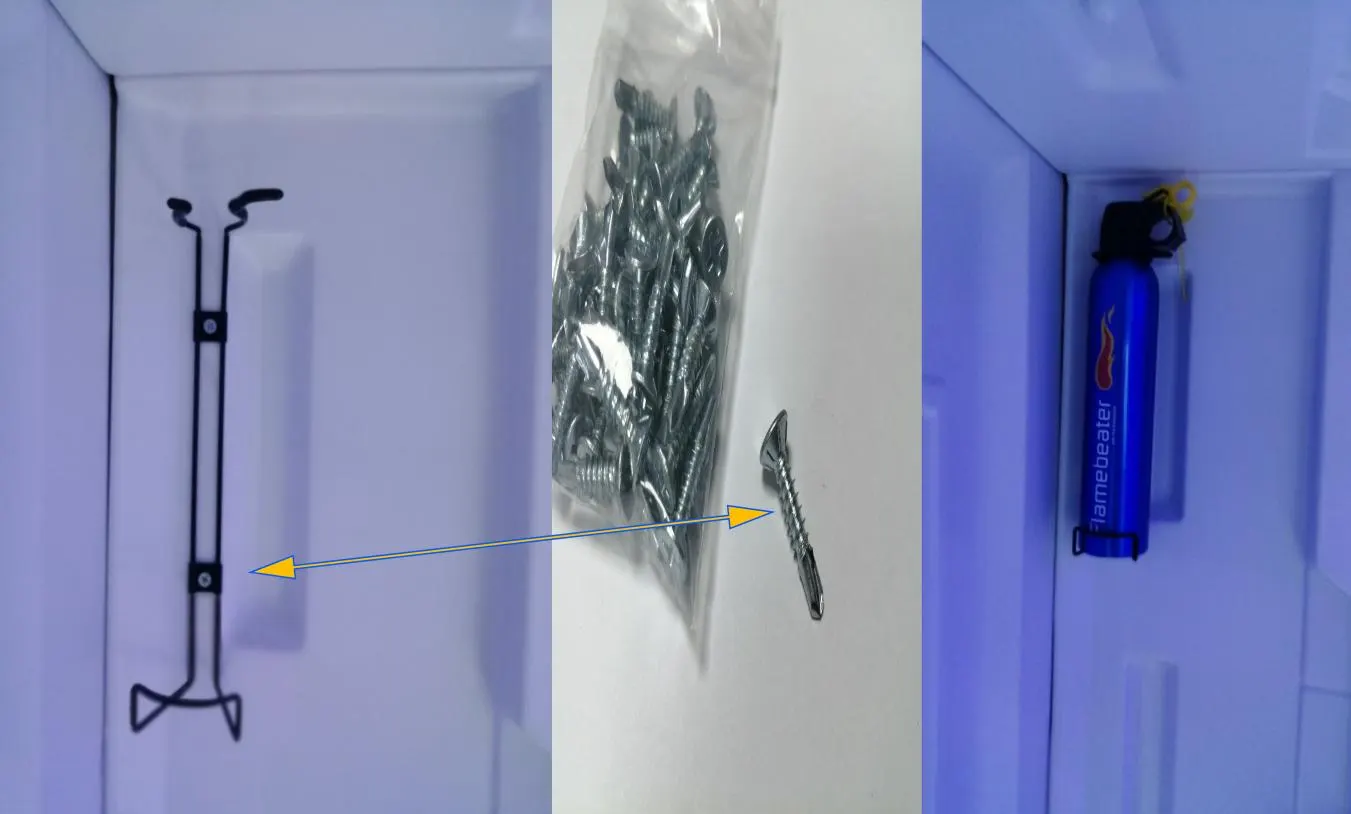
26. Prepare accessory parts
26

Prepare accessory parts

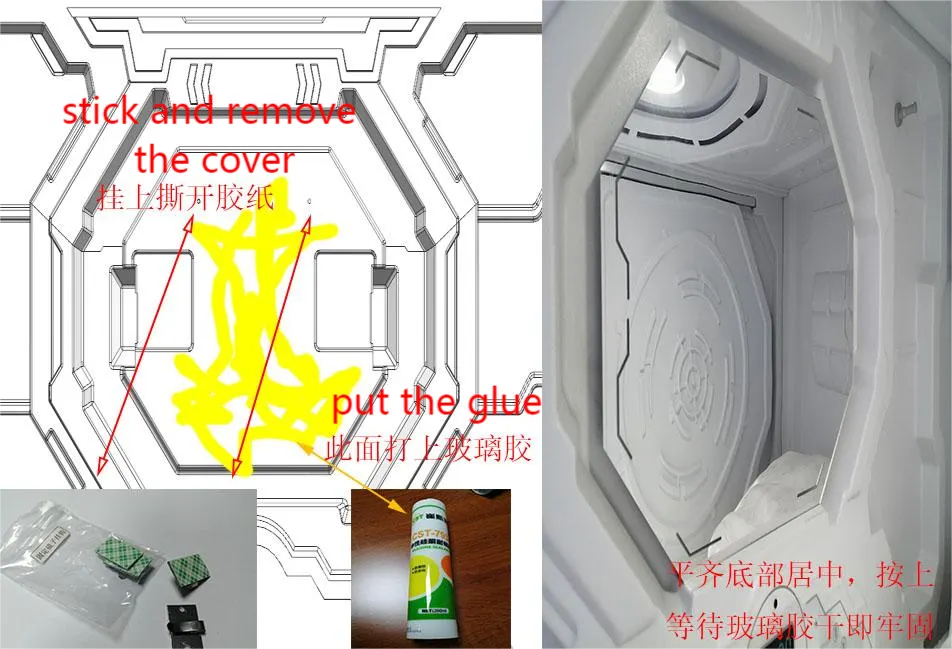
27. Install internal accessory set
27

Install internal accessory set

28. Install control and fitting accessories
28

Install control and fitting accessories

29. Verify accessory placement
29

Verify accessory placement

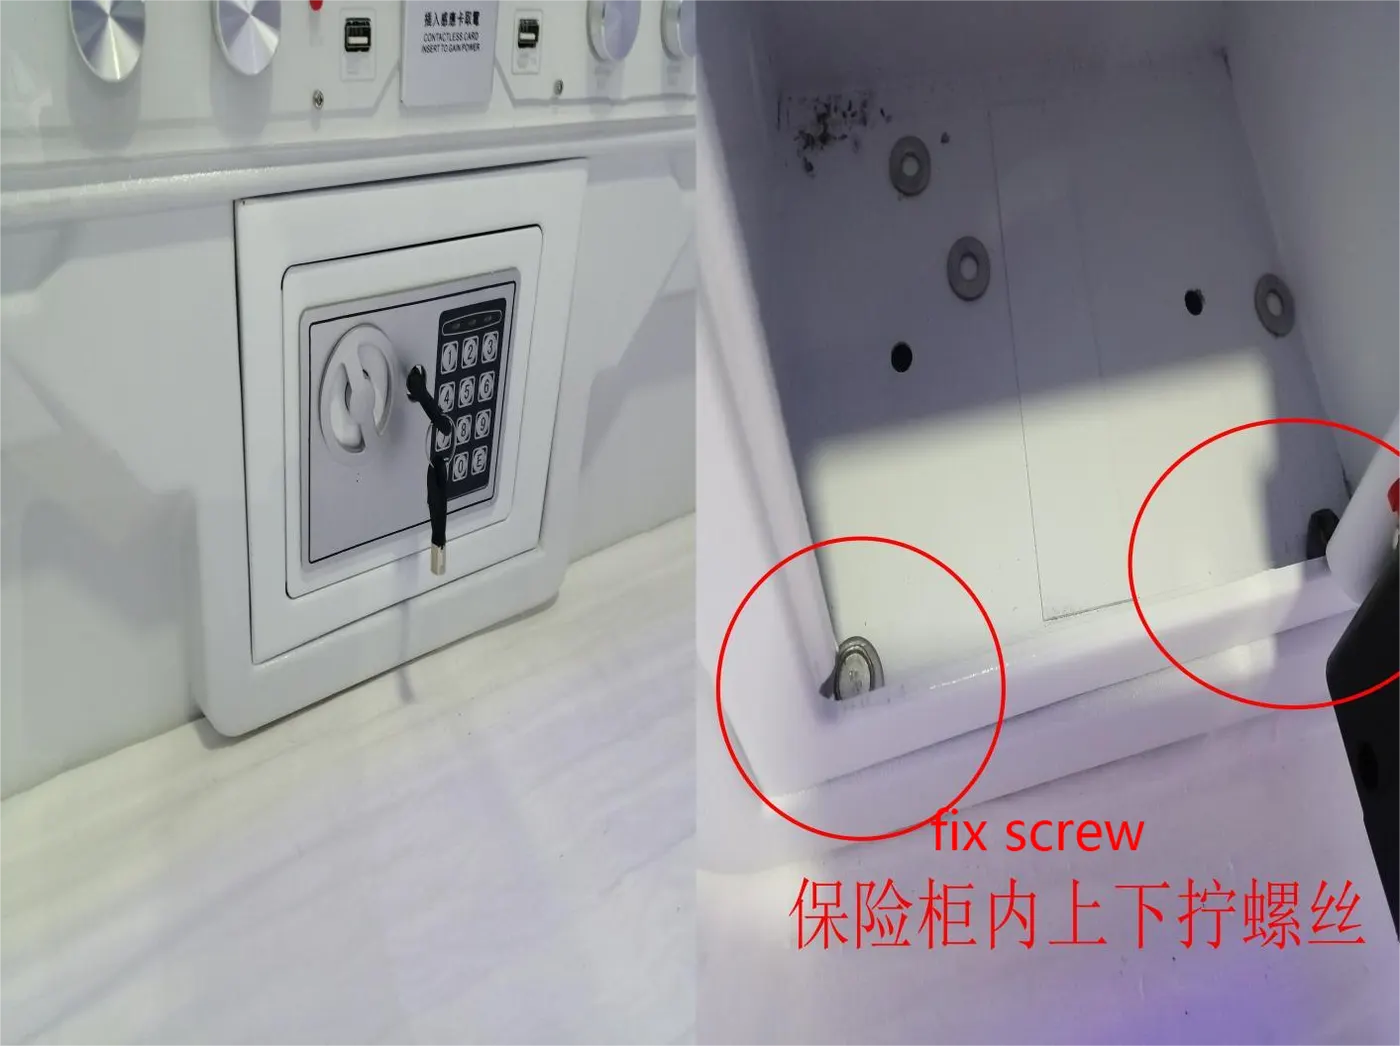
30. Check accessory fixing points
30

Check accessory fixing points

31. Complete accessory installation
31

Complete accessory installation

32. Review accessory close-up detail
32

Review accessory close-up detail

33. Check final accessory arrangement
33

Check final accessory arrangement

34. Confirm accessory finish
34

Confirm accessory finish

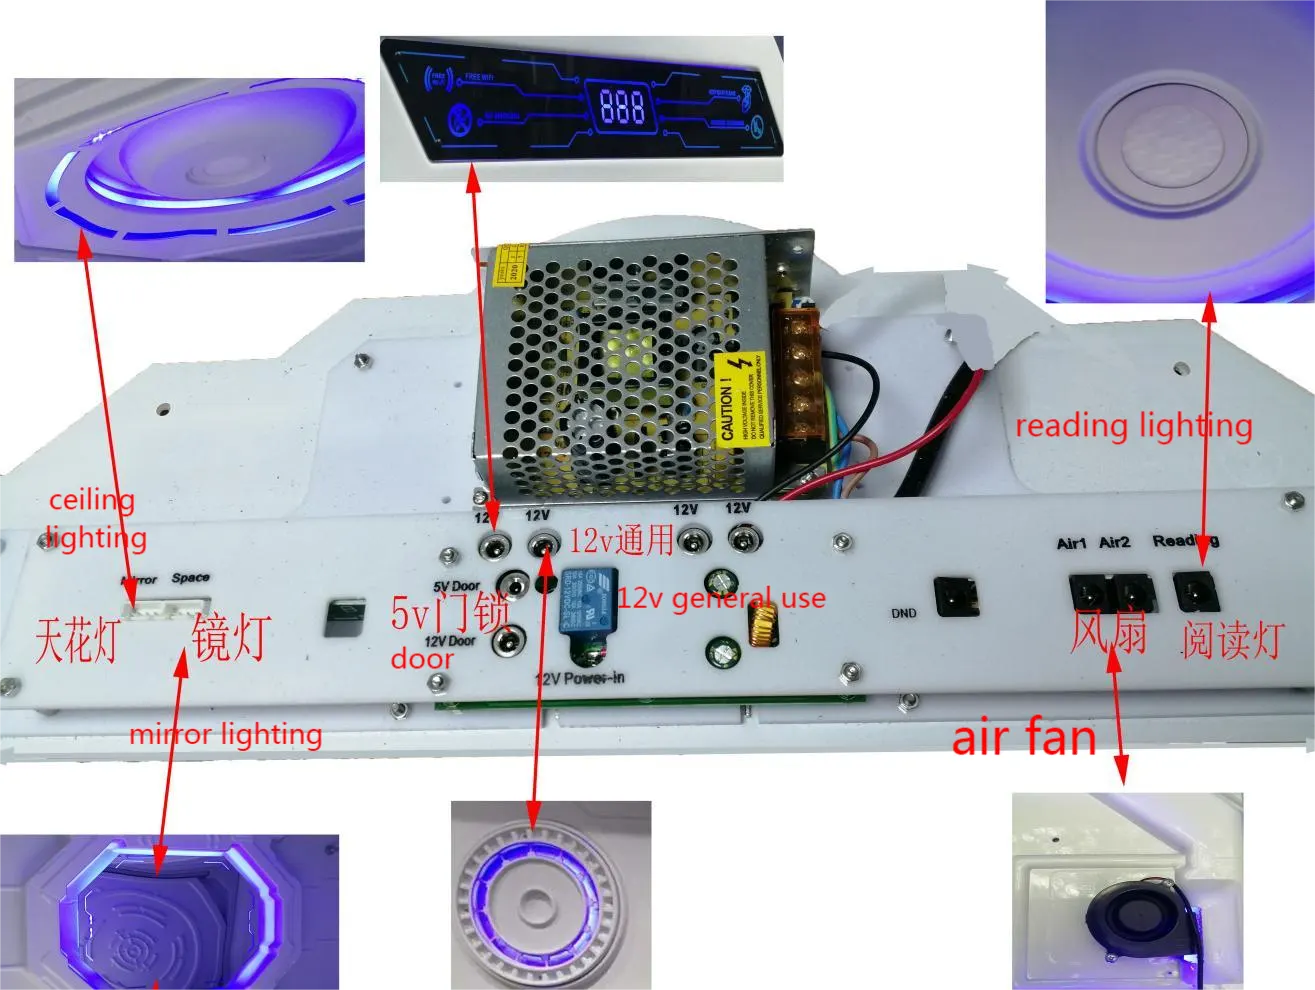
35. Electrical installation - part 1
35

Electrical installation - part 1

Electrical work should be completed by a qualified technician using the supplied wiring diagram and local safety practice.
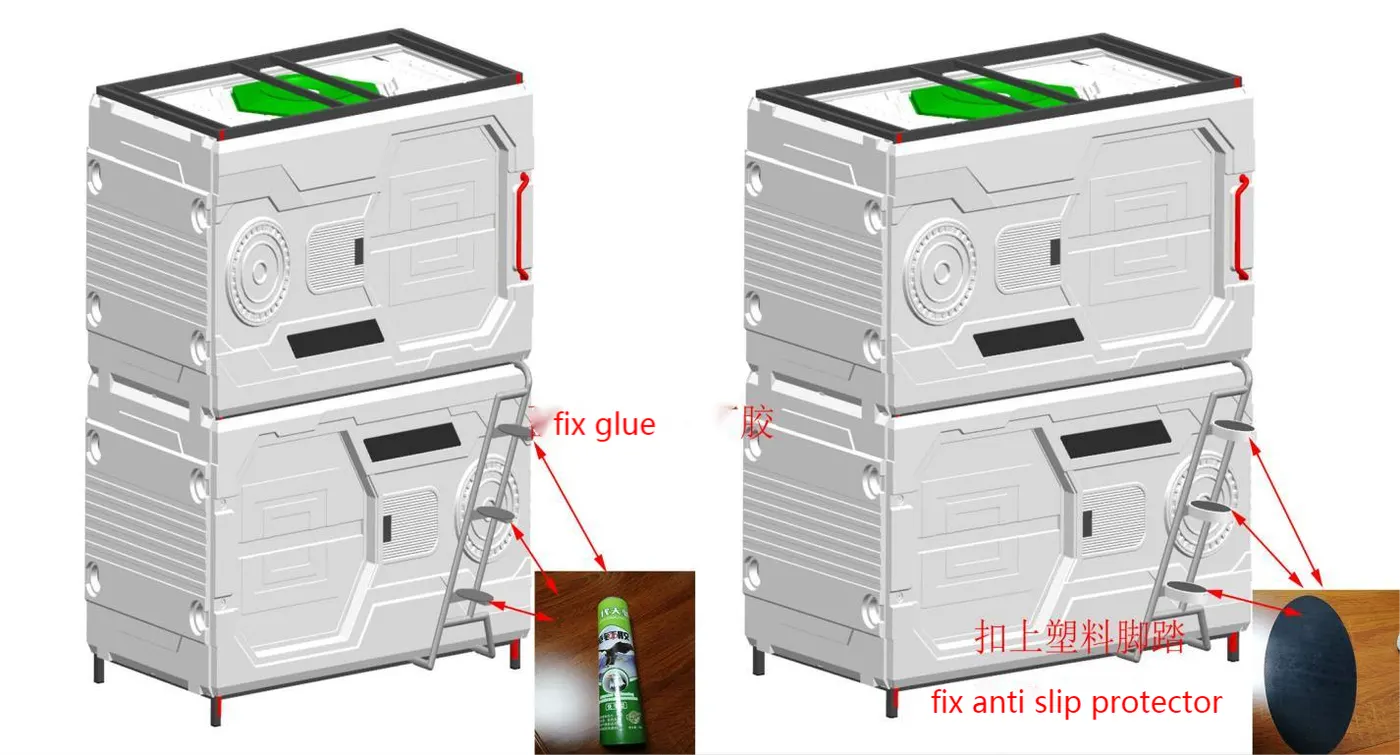
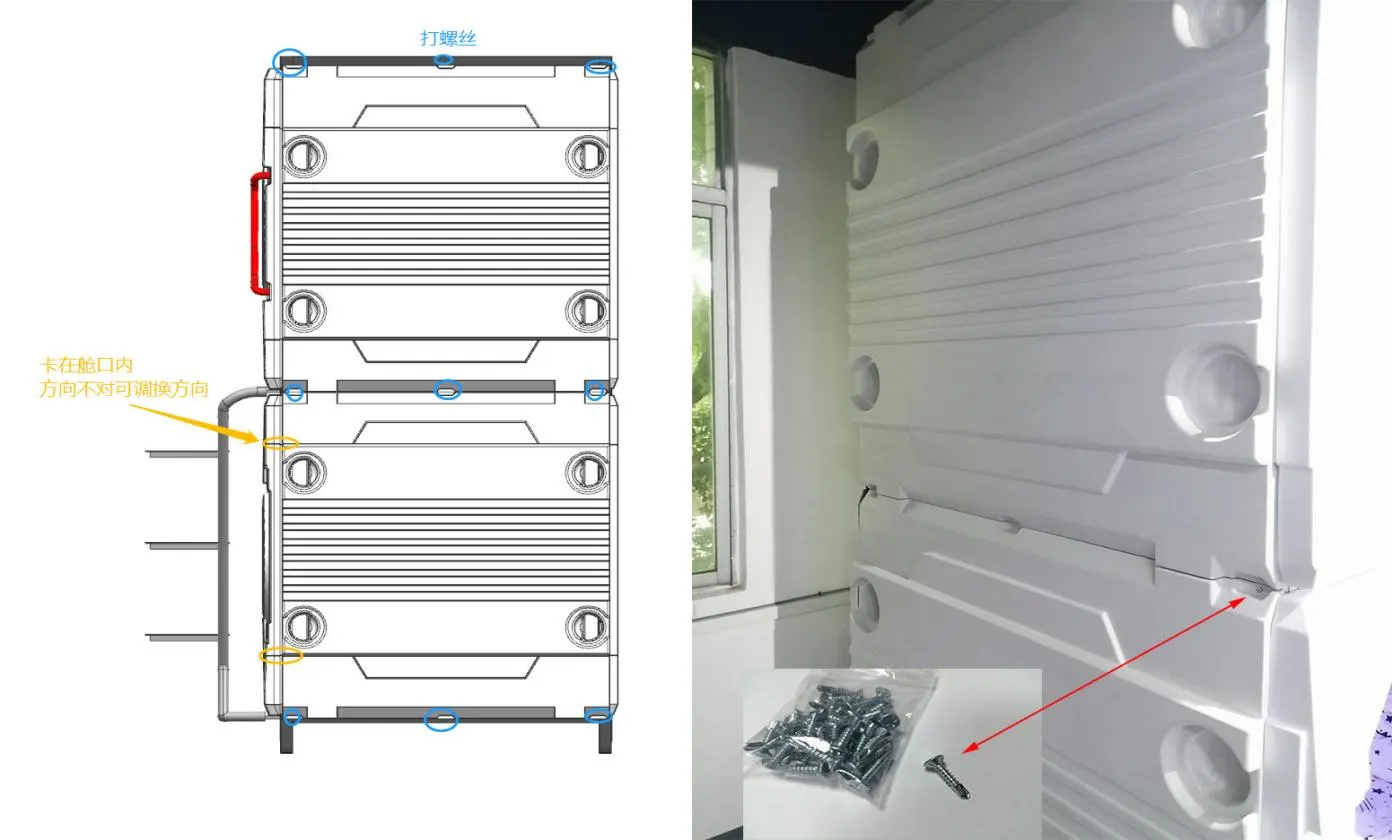
36. Electrical installation - part 2
36

Electrical installation - part 2

37. Install side panel
37

Install side panel

38. Install back panel
38

Install back panel

Reading the dimension labels (across the site)

Every product page lists a single pod's external size as L × W × H mm (length × width × height). The ladder, when included, adds about 300 mm to the length. Stacked-set images show 2 pods one above the other; height roughly doubles, width and length stay the same.

Need installation support?

Share your site photos, room size and pod model with BIDUA. We can help verify layout, accessory placement and installation sequence before dispatch or site work.